
Can I build a kitchen island myself? Yes, you absolutely can build a kitchen island yourself! With good plans and step-by-step instructions, even a dedicated beginner can tackle a DIY kitchen island project. This guide will walk you through everything you need to know to create a beautiful and useful island kitchen design right in your own home.
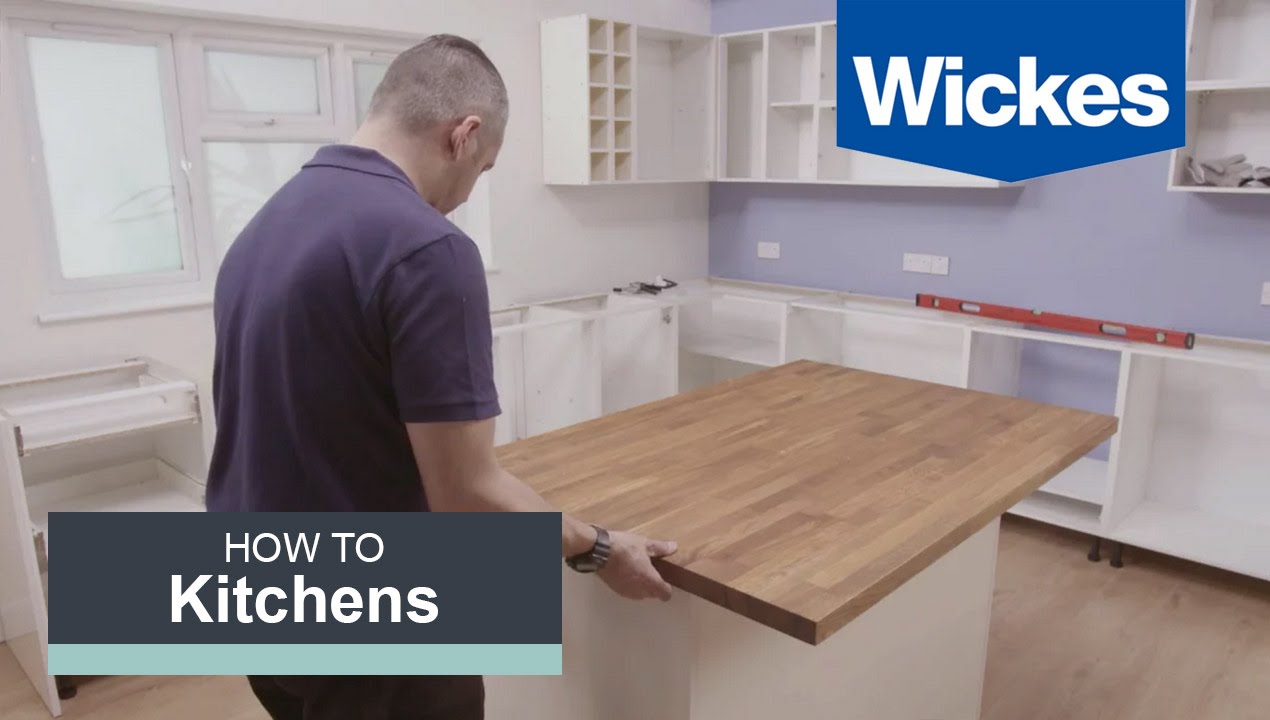
Image Source: i.ytimg.com
Deciphering the Kitchen Island Project Basics
Building an island is a big job. It adds space, storage, and style. Before you grab your tools, you need a solid plan. Think about what you want the island to do. Do you need extra workspace? Do you want a place to eat? Do you need to fit in a sink or cooktop? These choices shape the whole project.
Choosing the Right Size and Location
The best kitchen island size fits your space well. A too-big island blocks traffic. A too-small island offers little benefit.
Key Measurement Rules:
- Walkways: You need at least 36 inches of space around the island. If you have appliances that open (like the dishwasher or oven), aim for 42 to 48 inches of clear space there.
- Room Dimensions: Measure your kitchen carefully. Draw a layout on paper first. See how the island fits with existing cabinets and doors.
For many kitchens, an island between 60 to 72 inches long works well. The depth is often standard at 24 inches for the cabinet section, plus overhang for seating.
Getting Your DIY Kitchen Island Plans
Do not skip this step! Good plans save time and money. You can find pre-made plans online, or you can design your own custom kitchen island tutorial if you are experienced.
What Plans Should Include:
- Footprint: The exact measurements of the base.
- Materials List: Every screw, board, and piece of hardware.
- Utility Locations: Where the plumbing or electric lines will go.
- Framing Details: How the main structure supports the top.
If you are aiming to build kitchen island with storage, make sure the plans detail the depth needed for shelves or drawers. Standard drawers need about 24 inches of depth.
Building the Foundation: The Island Base
The base cabinet section is the core of your island. This is what holds the weight of the countertop and provides the storage.
Selecting Kitchen Island Base Cabinet Ideas
You have two main paths here: buying pre-made cabinets or building the frame from scratch.
- Using Stock Cabinets: This is faster. You buy standard base cabinets (usually 24 inches deep). You connect these boxes together securely. This works great if you plan on having a simple, rectangular island.
- Building a Custom Frame: This offers total control over size and features. You build a sturdy box frame using 2×4 lumber. This is often needed if you want a unique shape or plan to installing a kitchen island sink.
If you build the frame, remember to frame out spaces for doors and drawers perfectly. Use quality plywood for the sides.
Assembling the Base Structure
If you are building from scratch, the steps are straightforward:
- Cut the Lumber: Cut the 2x4s to the required lengths for the base, sides, and supports.
- Build the Outer Frame: Screw the long and short pieces together to form the perimeter. Use strong wood screws (like 3-inch construction screws). Ensure every corner is square using a carpenter’s square.
- Add Internal Supports: Place vertical supports inside the frame every 12 to 16 inches. These supports are crucial, especially if you plan on heavy appliances or stone tops.
- Attach the Plywood Skin: Cover the outside of the frame with cabinet-grade plywood (usually 3/4 inch thick). Screw the plywood securely to the frame. This creates the finished look of the cabinet box.
- Leveling the Base: Place the assembled base where you want it. Use shims under the base to make sure it is perfectly level side-to-side and front-to-back. A level base prevents countertop cracks later.
Incorporating Storage Features
To build kitchen island with storage, you must plan for this before skinning the frame.
- Shelves: Build simple wood frames inside the empty spaces for fixed shelves. Use 3/4-inch plywood for the shelves. Screw support cleats (small strips of wood) to the inside walls, then rest the shelf on top.
- Drawers and Doors: If using stock cabinets, follow the manufacturer’s instructions for connecting them. If building custom openings, frame the openings precisely to the size needed for your drawer slides or cabinet hinges.
| Storage Type | Installation Difficulty | Best Use Case |
|---|---|---|
| Open Shelving | Easy | Display items, cookbooks |
| Standard Drawers | Medium | Utensils, linens |
| Deep Pot Drawers | Medium/Hard | Pots and pans |
| Cabinet Doors | Easy/Medium | Hiding trash bins or larger items |
Handling Utilities: Water and Electric
This is the trickiest part for DIYers. If you are not comfortable with plumbing or electrical work, hire licensed pros for these specific steps. Safety is key here.
Installing a Kitchen Island Sink
If your island kitchen design includes a sink, you must run water supply lines (hot and cold) and a drain line to the island’s location before you finalize the floor and base.
- Rough-In Plumbing: The floor needs to be opened (or you need access from a basement/crawlspace) to run PEX or copper lines and the drain pipe up to the island footprint.
- Cabinet Placement: Position the island base so the plumbing stub-ups line up exactly where the sink drain and supply valves need to be.
- Securing the Sink: Once the countertop is on (see next section), you will typically install the sink from below (undermount) or drop it in from above (top-mount). Follow the sink manufacturer’s directions closely for sealing and clips.
Wiring for Kitchen Island Lighting
Island lighting makes a statement. Pendants or a single fixture need dedicated power.
- Circuit Planning: Determine if you need a new dedicated circuit or if you can tap into an existing one (check local code requirements for this).
- Running the Wire: The electrical cable (usually 14/2 or 12/2 Romex) must be run inside the walls and under the floor to the center of the island location. This is usually done before installing finished flooring.
- Junction Box: Install a proper electrical junction box (J-box) securely mounted inside the island frame structure where the wires meet. This box must be accessible if you need future repairs.
- Fixture Connection: Once the rough wiring is done, the electrician connects the fixture wires to the house wiring inside the J-box. Always hire an electrician to make the final connections and inspect the work to ensure safety and code compliance.
Choosing and Installing the Countertop
The countertop defines the look and feel of your island. Your choice of kitchen island countertop materials affects cost, durability, and installation difficulty.
Common Countertop Materials
| Material | Pros | Cons | DIY Difficulty |
|---|---|---|---|
| Butcher Block (Wood) | Warm look, easy to repair, affordable | Requires sealing/oiling, can scratch | Low |
| Laminate | Very cheap, huge color range | Easily damaged by heat/scratches | Low |
| Quartz/Granite | Highly durable, premium look | Very heavy, expensive, requires pro cutting | High |
| Concrete/Tile | Unique look, customizable | Heavy, grout cleaning (for tile) | Medium/High |
Preparing for Installation
Whether you buy a pre-made top or have stone fabricated, the island base must be rock solid.
- Support Structure: If you chose stone or heavy quartz, you need a super-strong frame. Use doubled-up 2x4s or even steel supports inside the cabinet frame to carry the load. A standard 24-inch deep cabinet frame might only support 50 lbs per foot; stone tops can weigh 200 lbs per foot!
- Overhangs: If you are adding seating to kitchen island, you need an overhang. A comfortable overhang for seating is 12 to 15 inches deep. Ensure your base structure has robust support corbels or brackets underneath this overhang so the top doesn’t tip or break.
Attaching the Top
- Wood/Laminate: These materials expand and contract with humidity. Attach them using “L” brackets screwed into the top support frame, allowing a small gap for movement. Do not glue wood tops rigidly.
- Stone/Engineered Stone: These are usually glued down using specialized silicone adhesive (like construction-grade silicone or epoxy). The stone fabricator often installs the top, but if you are doing it yourself, carefully lift the top into place, align it perfectly, and apply the adhesive along the support structure. Clamp or weigh it down gently until the adhesive cures.
Adding Seating to Kitchen Island
A functional island often doubles as a casual dining spot. This requires careful planning for legroom.
Seat Placement and Spacing
The comfort of your seating depends on the distance between seats and the depth of the overhang.
- Elbow Room: Allow at least 24 inches of width per person sitting at the island.
- Leg Room: The minimum comfortable overhang is 12 inches deep for counter-height seating (usually 36 inches tall). For bar-height seating (42 inches tall), you need 12 to 15 inches of depth.
If you are adding seating to kitchen island that already has cabinets along the main working side, you must ensure the cabinets stop short of the seating area to allow knees to fit underneath. This usually means the island will have an “L” shape or a defined seating ‘nook.’
Choosing the Right Height
The height of the island dictates the type of stool you buy:
- Counter Height (34–36 inches): Uses standard dining chairs or lower counter stools. Comfortable for meal prep while standing or sitting.
- Bar Height (40–42 inches): Requires tall bar stools. Better for quick meals or separating workspaces from dining areas.
Finishing Touches and Finalizing Your Island
Once the structure and top are secure, it is time to make it look professional.
Attaching Doors and Drawers
If you built the frame yourself and are installing these components now, follow the hardware instructions precisely.
- Drawer Slides: Measure carefully. The slides must be mounted perfectly level and parallel inside the opening for the drawer to glide smoothly. Use a level often.
- Hinges: Modern European-style hinges are easy to adjust. Mount the base plate first, then clip the door onto the plate. Adjust the screws to align the door perfectly with its neighbors.
Finalizing Electrical and Plumbing Connections
- Electrical Inspection: If you did the wiring yourself, have an inspector check it if required by local law. Install the switches, outlets, and pendant light fixtures now. Make sure all wires are tucked away neatly inside the base.
- Plumbing Hookup: Connect the water supply lines to the shut-off valves. Connect the drain pipe to the P-trap and the main drain line. Run the water and check for leaks immediately.
Custom Kitchen Island Tutorial Checklist Summary
This process requires attention to detail at every phase. Use this checklist to track your progress.
| Stage | Task Detail | Status |
|---|---|---|
| Planning | Finalized best kitchen island size and layout. | ☐ |
| Planning | Acquired DIY kitchen island plans. | ☐ |
| Base Build | Framed the base square and level. | ☐ |
| Base Build | Incorporated kitchen island base cabinet ideas (storage/open space). | ☐ |
| Utilities (Optional) | Ran electrical lines for wiring for kitchen island lighting. | ☐ |
| Utilities (Optional) | Stubbed in water lines for installing a kitchen island sink. | ☐ |
| Top Prep | Installed necessary internal supports for heavy kitchen island countertop materials. | ☐ |
| Top Install | Secured the chosen countertop material. | ☐ |
| Seating | Confirmed adequate overhang for adding seating to kitchen island. | ☐ |
| Finishing | Installed doors, drawers, and hardware. | ☐ |
| Final Check | Tested all electric and plumbing functions. | ☐ |
Building an island is rewarding. Take your time, measure twice, and enjoy creating a centerpiece for your kitchen!
Frequently Asked Questions (FAQ) About Building a Kitchen Island
Q1: How much weight can a standard DIY island base support?
A standard 2×4 framed island base, properly constructed and attached to the floor, can usually hold about 50 to 75 pounds per square foot (PSF) across the top, depending on how tightly it is braced. However, heavy materials like granite or quartz countertops can easily weigh 200 PSF. For stone tops, you must double the internal framing or use steel supports beneath the overhang areas.
Q2: Should I run utilities inside the island before or after laying the finished floor?
You should always run utility lines (water supply, drain, and electrical conduit/cable) before installing finished flooring (like hardwood, tile, or vinyl). It is much easier and less destructive to cut into subflooring than finished flooring. If you have a basement or crawlspace below, this work is much simpler as you can run lines beneath the floor joists.
Q3: What is the difference between counter height and bar height for an island?
Counter height is typically 34 to 36 inches high, matching standard kitchen counters. This is comfortable for working and allows people to sit on standard dining chairs or lower counter stools. Bar height is taller, usually 40 to 42 inches high, and requires tall bar stools.
Q4: How much overhang is needed for seating comfort?
For comfortable seating, you need an overhang of at least 12 inches deep for standard counter height islands. If you prefer more room to tuck your knees under, aim for 15 inches. Always check the requirements for your specific stool height.
Q5: Can I use old cabinets to build my island base?
Yes, you can! Reusing existing base cabinets is a great way to save money and speed up the process. You connect the cabinets tightly together using screws through the side panels where they meet. You must then build a surrounding frame or ‘pony wall’ around the exterior of the cabinets to provide a solid anchor point for the finished plywood skin, trim, and especially the heavy countertop.