
What is the best way to clean kitchen floor grout? The best way to clean kitchen floor grout often involves a combination of simple household items like baking soda and vinegar, followed by effective grout cleaning tools for scrubbing.
Cleaning the grout between your kitchen tiles can feel like a big chore. Dirty grout makes even the cleanest tiles look dull. Food spills, grease, and daily traffic turn light-colored grout into a muddy brown or gray mess. But fear not! This guide gives you simple, effective hacks to restore your kitchen floor grout, from gentle DIY grout cleaning methods to tackling tough stains.
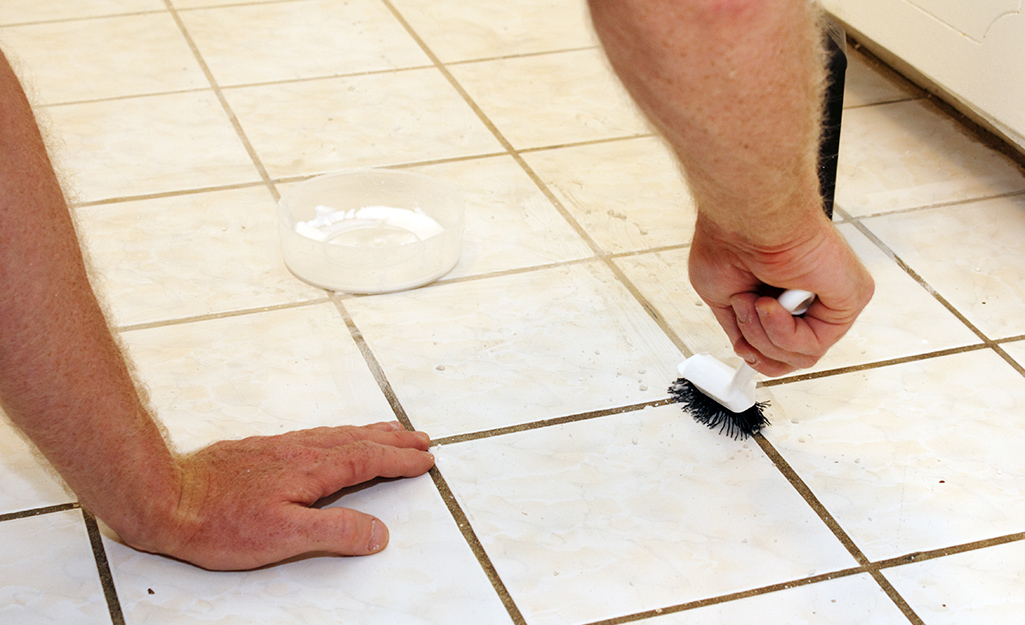
Image Source: contentgrid.homedepot-static.com
Why Kitchen Grout Gets So Dirty
Kitchen floors take a beating. Grout lines are porous, meaning they act like tiny sponges. They soak up everything that spills near them.
- Grease and Oil: Cooking splashes grease everywhere. This oil settles into the grout pores.
- Food Stains: Tomato sauce, wine, and coffee leave strong colors behind.
- Moisture and Mildew: Kitchens are humid. Constant moisture allows mold and mildew to grow in the grout.
- Dirt Traffic: Shoes track in dirt, which gets ground deep into the porous lines.
Keeping grout clean means two things: using the right cleaning power and using the right physical force.
Essential Grout Cleaning Tools You Will Need
Before starting, gather your supplies. Having the right grout cleaning tools makes the job faster and easier.
| Tool Category | Specific Items | Purpose |
|---|---|---|
| Scrubbing | Stiff-bristled brush (grout brush is ideal) | For scrubbing tile grout directly. |
| Old toothbrush | Great for small, tight corners. | |
| Microfiber cloths or old towels | For wiping up residue and drying. | |
| Application | Spray bottle | To apply grout cleaning solutions evenly. |
| Small bowl or bucket | For mixing homemade cleaners. | |
| Safety | Rubber gloves | To protect skin from cleaners. |
| Safety glasses | To protect eyes from splashes. |
Powerful DIY Grout Cleaning Solutions
You don’t always need harsh chemicals. Many effective grout cleaning solutions are already in your pantry. These DIY grout cleaning methods are often safer for your family and your tiles.
The Baking Soda and Vinegar Paste (The Classic Hack)
This is the most popular natural grout cleaner. The fizzing action helps lift dirt out of the grout pores.
- Mix the Paste: Mix one part water with three parts baking soda to form a thick paste. You want something spreadable, not runny.
- Apply: Use an old toothbrush or a small brush to apply the paste directly onto the grout lines.
- Wait: Let the paste sit for about 10 minutes.
- Activate: Fill a spray bottle with white vinegar. Spray the vinegar directly onto the baking soda paste. It will foam and bubble vigorously. This reaction is cleaning your grout!
- Scrub: Once the fizzing slows down, use your stiff brush for scrubbing tile grout. Work in small sections.
- Rinse: Wipe the area clean with a damp cloth.
Hydrogen Peroxide Power Boost
For grout that is slightly stained or showing signs of mildew, hydrogen peroxide adds extra whitening power to the baking soda mix.
- Combine baking soda, a small amount of dish soap, and enough hydrogen peroxide to make a paste.
- Apply and let sit for 15 to 20 minutes.
- Scrub and rinse well. This is great for removing stains from tile grout.
Ammonia for Tough Grease
If you have heavy grease buildup common in kitchen areas, ammonia can cut through it. Use extreme caution with this method.
- Never mix ammonia with bleach or vinegar.
- Mix one cup of ammonia with a gallon of warm water.
- Apply the solution to the grout. Let it sit for 5 minutes.
- Scrub hard and rinse thoroughly with plain water. Good ventilation is key when using ammonia.
Tackling Stubborn Stains and Deep Cleaning
Sometimes, surface cleaning is not enough. You need methods for deep cleaning floor grout and tackling specific issues like mold or old discoloration.
Dealing with Deeply Set Dirt and Old Grime
When scrubbing tile grout by hand doesn’t work, you need to escalate your efforts.
Using a Steam Cleaner
A steam cleaner is one of the most effective grout cleaning tools for deep cleaning. The high heat sterilizes the area and loosens embedded dirt without harsh chemicals.
- Fill the steam cleaner reservoir.
- Attach the small, pointed nozzle attachment.
- Direct the steam jet right onto the grout line.
- As the steam softens the grime, quickly wipe the area with a clean, damp cloth. The dirt usually lifts right off.
Utilizing a Commercial Grout Cleaner
When natural methods fail, it might be time for a commercial grout cleaner. These products contain stronger acids or alkaline builders designed to dissolve embedded minerals and stains.
- Read the Label: Always check if the product is safe for your specific tile type (e.g., natural stone tiles can be etched by acid-based cleaners).
- Spot Test: Apply a small amount in an inconspicuous area first.
- Follow Directions Precisely: These products require specific dwell times. Too short, and they won’t work. Too long, and they might damage the grout.
Specific Stain Removal Guides
Removing stains from tile grout requires knowing what caused the stain.
| Stain Type | Recommended Approach | Notes |
|---|---|---|
| Oil/Grease | Baking soda paste mixed with dish soap (acts as a degreaser). | Let it sit for at least 30 minutes before scrubbing. |
| Mold/Mildew | Hydrogen peroxide or diluted bleach solution (1 part bleach to 10 parts water). | Ensure strong ventilation. Rinse very thoroughly after use. |
| Coffee/Wine | Oxygen bleach (powder mixed with water) or a commercial stain remover. | These stains respond well to oxidation. |
| Rust | Commercial rust remover designed for porous surfaces. | Rust stains are mineral-based and often require specialized chemicals. |
The Power of Specialized Grout Cleaning Tools
While a toothbrush works in a pinch, specialized tools offer better leverage and reach, especially for large kitchen floors.
Grout Brushes vs. Power Tools
Grout brushes are designed with tough, stiff nylon bristles that fit perfectly into the recessed grout lines. They provide excellent manual friction.
For those with extensive tiling or severe buildup, power tools are a game-changer:
- Electric Grout Scrubbers: These battery-powered tools use rotating or vibrating heads to scrub the grout lines with much less physical effort from you. They are efficient grout cleaning tools.
- Drill Attachments: Some stiff brushes can attach directly to a power drill. This significantly speeds up the process but requires a steady hand to prevent aggressive scrubbing that could damage the grout texture. Use low speed settings initially.
Proper Scrubbing Technique
When scrubbing tile grout, technique matters as much as the cleaner you use.
- Work in small, manageable squares (e.g., 3 feet by 3 feet).
- Apply steady, firm pressure directly down into the grout line, not across the tile surface.
- Move the brush along the grout line rather than scrubbing back and forth randomly. This ensures consistent cleaning.
The Importance of Rinsing and Drying
A common mistake in deep cleaning floor grout is inadequate rinsing. If you leave any cleaner residue behind—even homemade cleaners like vinegar—it can attract dirt faster, making your grout look dirty again quickly.
- Rinse Thoroughly: After scrubbing, use a sponge dipped in clean water to wipe the entire area multiple times. Change the rinse water often.
- Dry Completely: Use a clean, dry towel or a wet/dry vacuum to pull up excess moisture. Grout must be completely dry before moving to the next step.
Protecting Your Investment: Sealing Grout After Cleaning
Once you have achieved sparkling clean grout, the next crucial step is protection. Grout is porous, and without a seal, it will immediately start absorbing dirt and moisture again. Sealing grout after cleaning is essential for long-term maintenance.
Why Sealing Matters
A quality grout sealer fills the tiny pores in the grout material. This creates a barrier that repels water, oil, and stains.
- Easier Maintenance: Sealed grout is far easier to wipe clean.
- Stain Prevention: Spills bead up on the surface instead of sinking in.
- Longevity: It helps prevent cracking and moisture intrusion that leads to mold.
Choosing and Applying a Sealer
There are two main types of sealers: penetrating and topical. For floors, penetrating sealers are usually preferred as they soak into the grout without creating a slippery surface layer on the tile.
- Ensure Dryness: The grout must be bone dry (usually 24 to 72 hours) after deep cleaning floor grout. Check the sealer manufacturer’s instructions.
- Apply Precisely: Use a small foam applicator or brush to apply the sealer only to the grout lines. Avoid getting too much on the tile surface if possible, as it can leave a slight haze.
- Wipe Excess: Allow the sealer to sit for the recommended time (usually 10-15 minutes), then wipe off any excess that didn’t absorb fully.
- Cure Time: Allow the sealer to cure fully before heavy foot traffic returns. Most residential sealers last 1–3 years, depending on traffic and quality.
Maintaining Clean Grout: Preventative Measures
The secret to avoiding frequent, intense deep cleaning floor grout sessions is daily care.
Daily and Weekly Wipe-Downs
- Immediate Spill Cleanup: Wipe up spills immediately, especially liquids like wine or grease. Don’t let them sit for even an hour.
- Quick Mop: Use a microfiber mop with plain hot water for your regular kitchen mopping. Avoid harsh soaps that can break down your grout sealer over time.
Choosing the Right Floor Cleaner
When selecting grout cleaning solutions for maintenance mopping, remember that strong, highly acidic, or highly alkaline cleaners are not ideal for daily use because they erode the sealer and the grout itself.
Use pH-neutral floor cleaners. These clean effectively without stripping the protective sealant you applied during sealing grout after cleaning.
Comparing DIY vs. Commercial Grout Cleaners
If you are deciding between making your own paste or buying a commercial grout cleaner, consider the trade-offs.
| Feature | DIY (Baking Soda/Vinegar) | Commercial Cleaner |
|---|---|---|
| Cost | Very low; uses common household items. | Higher initial cost for the product. |
| Toxicity/Smell | Low toxicity; vinegar smell dissipates quickly. | Varies greatly; some are harsh and require full PPE. |
| Effectiveness | Excellent for general dirt and light stains. | Best for heavy mold, deep stains, or aged discoloration. |
| Speed | Requires more manual scrubbing tile grout. | Often works faster with less physical effort. |
| Safety | Generally very safe. | Requires careful reading of instructions and testing. |
For routine cleaning, stick to the natural grout cleaner methods. Reserve the strong commercial grout cleaner for emergencies or when removing stains from tile grout that have set for months or years.
Frequently Asked Questions About Grout Cleaning
Can I use bleach on my kitchen floor grout?
Yes, you can use a diluted bleach solution (1 part bleach to 10 parts water) to kill mold and mildew on grout. However, never mix bleach with ammonia or vinegar, as this creates toxic gas. Always rinse bleach residue out thoroughly afterward.
How often should I clean my kitchen floor grout?
For routine cleaning and spot treatment, clean spills as they happen. A deep cleaning floor grout session should happen every 1 to 3 months, depending on how busy your kitchen is. Reapplying the sealer should happen yearly or every time the sealer wears thin.
What is the safest way to clean grout if I have pets?
The safest approach involves DIY grout cleaning using baking soda and water or a very mild, pH-neutral soap solution. If you must use vinegar, ensure the area is completely rinsed and dry before letting pets walk on it, as strong vinegar can sometimes irritate paw pads. Avoid harsh commercial products completely.
My grout is dark gray, but the tile is white. Will cleaning restore the original color?
Often, yes. Grout turns dark because dirt and oils are embedded in the surface. Effective grout cleaning solutions and vigorous scrubbing tile grout will usually lift the surface grime, revealing the lighter color beneath. If the grout is very old or cracked, the dark color might be permanent damage or mold deep inside, which requires a stronger treatment or regrouting.
Can I use an acidic cleaner on natural stone tile grout?
No. If your kitchen has natural stone tiles (like slate, marble, or travertine), avoid all acidic cleaners, including straight vinegar. Acids etch and dull natural stone. Use only pH-neutral cleaners or specialized stone and grout cleaners. This is a crucial point when selecting grout cleaning solutions.