
What is the best way to make a wood cutting board for the kitchen? The best way to make a wood cutting board involves careful wood selection, precise cutting and gluing, and thorough sanding and finishing. This project is one of the most satisfying woodworking projects for kitchen improvements you can undertake.
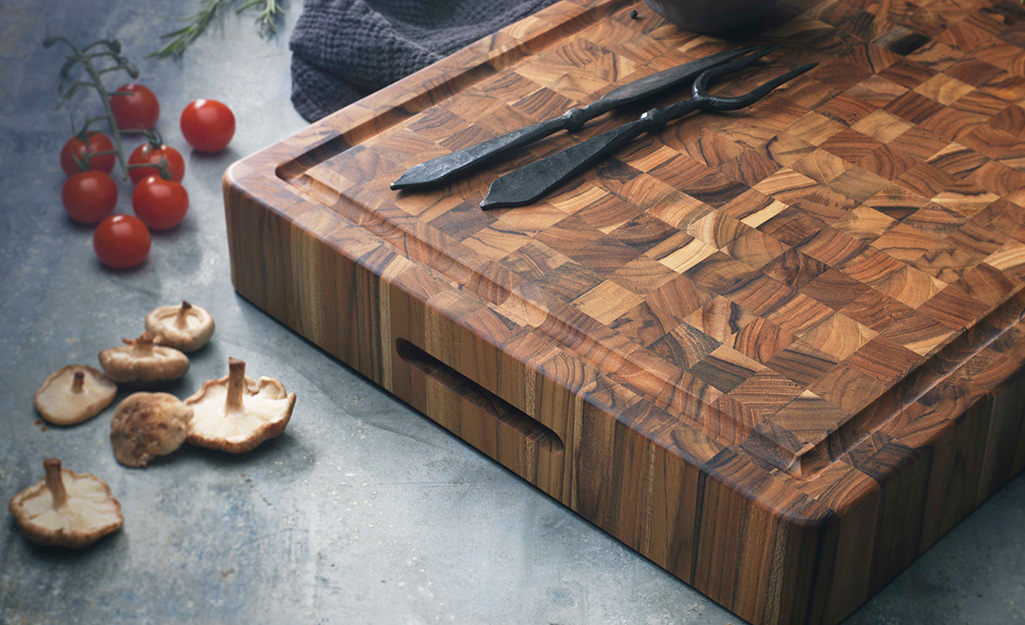
Image Source: contentgrid.homedepot-static.com
Choosing the Right Wood for Your Cutting Board
Selecting the right wood is the first, most crucial step. Not all woods are safe or durable enough for food contact. You need hard, dense woods that resist dents and moisture.
Safe and Durable Wood Species
We must pick woods that are food-safe and strong. Hardwoods are best. Avoid soft woods like pine, as they scratch easily and can harbor bacteria. Also, avoid woods that cause allergic reactions.
| Wood Type | Hardness (Janka Rating) | Notes |
|---|---|---|
| Maple (Hard Rock) | High (1450) | A top choice. Light color, fine grain. Very durable. |
| Cherry | Medium-High (950) | Beautiful color, slightly softer than maple. Ages well. |
| Walnut | Medium (1010) | Dark, rich color. Popular for visual appeal. |
| Beech | Medium-High (1300) | Very hard and tough. Good, affordable option. |
For those seeking the ultimate in longevity, building a butcher block often means using hard maple. This wood stands up well to heavy chopping.
Wood Grain Orientation: Edge Grain vs. End Grain
There are two main styles for cutting boards: edge grain and end grain. Each has distinct pros and cons.
Edge Grain Cutting Boards
Edge grain boards are made by gluing long strips of wood side-by-side, so the long side of the wood strip faces up. This is the simpler method for DIY cutting board plans.
- They are easier and faster to build.
- They are generally less expensive to make.
- They are harder on knives because the grain resists the blade edge.
End Grain Cutting Boards
An end grain cutting board tutorial focuses on blocks glued together so the wood fibers point upwards, like looking down the end of a bundle of straws.
- These are the superior choice for knives. The fibers separate when you cut, then close back up. This keeps knives sharper longer.
- They require more wood pieces and more complex gluing and clamping wood for cutting boards.
- They tend to absorb moisture more readily, needing more frequent oiling.
If you aim for a professional-level board, aim for an end grain design.
Preparing Your Lumber for Assembly
Wood must be flat, straight, and the right thickness before you glue it up. This ensures a tight glue line, which is vital for strength.
Milling the Boards Straight
Use a jointer and a planer if you have access to them. If not, you can often buy pre-milled, square lumber from specialty wood suppliers.
- Joint one face: Make one face perfectly flat.
- Joint one edge: Make one edge perfectly square to the flat face.
- Plane to thickness: Plane the opposite face until the board reaches your desired thickness. Ensure both faces are parallel.
- Rip to width: Cut the final edge parallel to the first jointed edge to achieve the correct width.
This process ensures all strips fit perfectly edge-to-edge. A good fit is key when clamping wood for cutting boards.
Sizing the Strips
For edge grain, cut your strips to the final length and width. For end grain, you must first create long “rails” and then cut these rails into short “fingers” to be assembled vertically. This initial sizing depends entirely on the final board dimensions you seek.
Gluing Up: Creating the Blank
Gluing the strips together creates one large panel, called the blank. This step demands speed and pressure.
Selecting the Right Adhesive
Choosing wood glue for cutting boards is critical for food safety and bond strength.
- Type: You must use a waterproof or water-resistant glue. Titebond III (Aliphatic Resin) is the industry standard for cutting boards because it is FDA approved for indirect food contact and offers strong, waterproof bonds.
- Avoid: Standard white PVA glues (like Titebond I) are not water-resistant enough for kitchen use.
The Gluing Process
Work quickly. Once the glue is applied, you only have a short “open time” before the glue starts to set.
- Layout: Lay out all your strips on a flat surface. Double-check the order, especially if using contrasting woods.
- Apply Glue: Apply a thin, even coat of glue to both mating surfaces of every joint. Use a roller or brush for the best coverage. Do not use too much glue; thick lines result in weak bonds.
- Assembly: Quickly bring the strips together, ensuring the grain pattern is correct.
- Clamping: This is the most important part of clamping wood for cutting boards. Use robust bar clamps or pipe clamps. Place clamps both above and below the board.
- Pressure Check: Tighten clamps until you see a thin, continuous bead of glue squeeze out along the entire length of every joint. This shows you have enough pressure.
- Flatness: Place scrap wood cauls (straight pieces) on the top and bottom surfaces before clamping. This prevents the pressure from causing the board to bow or ripple as you tighten the clamps.
Let the glue cure completely. This usually takes 12 to 24 hours, depending on the glue and humidity. Do not rush this step!
Flattening and Shaping the Blank
After the glue cures, the blank will look rough. It will have uneven edges and excess dried glue. Now, you must flatten it.
Removing Excess Glue and Initial Flattening
First, use a sharp chisel or scraper to remove the bulk of the dried glue squeeze-out. Be careful not to dig into the wood fibers.
Then, you must flatten the board. If you have a wide-belt sander, this is the fastest way. If not, you can use a router sled setup.
Router Sled Flattening
This method uses a router base attached to a sliding platform (the sled) that rides over rails clamped to the board.
- Build the Sled: Create a flat base for your router.
- Set the Rails: Clamp perfectly parallel rails on either side of the cutting board blank.
- Flattening: Use a large diameter flush-trim bit or a large surfacing bit. Adjust the router height so the bit takes off only a tiny amount of material with each pass. Move the sled smoothly across the entire surface until both sides are perfectly flat and parallel to each other.
Cutting to Final Dimensions
Once flat, trim the board to its final length and width using a table saw or circular saw with a guide rail. Ensure all edges are square (90 degrees).
If you are making a decorative board, this is when you might add features like juice grooves or rounded edges using a router.
Sanding and Finishing Cutting Boards
This stage turns a rough blank into a beautiful, food-safe kitchen item. Proper sanding and finishing cutting boards ensures longevity and hygiene.
The Sanding Progression
Sanding must be done gradually, moving through grits without skipping too many steps. Skipping grits traps deeper scratches beneath the surface of the next, less coarse grit, leading to a poor finish later.
- Start Coarse: Begin with 80-grit sandpaper. This removes any small imperfections left from flattening.
- Move Up: Switch to 100-grit, then 120-grit.
- Refining: Progress to 150-grit, 180-grit, and finally 220-grit. For a very silky smooth finish, some craftsmen go up to 320-grit.
Tip for End Grain: End grain surfaces often raise their fibers slightly when they first touch water. To combat this, lightly mist the board with water after the 120-grit sanding pass. Let it dry fully. Then, lightly sand with 180-grit to knock down the raised fibers. This “water popping” technique ensures a smooth final surface.
Shaping the Edges
Use a router with a round-over bit or a chamfer bit to ease the sharp edges. This makes the board comfortable to hold and less prone to chipping. After routing, return to your final sanding grit (220 or 320) to smooth the newly shaped edges.
Applying the Finish: Oiling Homemade Cutting Boards
The finish protects the wood from water, stains, and bacteria growth. You must use food-safe finishes.
The Best Oils and Waxes
What oil should you use? You need mineral oil or specialized board conditioner.
- Mineral Oil: This is widely recommended. It is inexpensive, colorless, odorless, and does not go rancid.
- Beeswax/Mineral Oil Mix: A paste wax made from beeswax and mineral oil seals the surface better than oil alone, offering a smoother feel and longer protection.
- Avoid: Vegetable oils like olive oil or canola oil. These turn rancid over time, making your board smell terrible and become sticky.
When oiling homemade cutting boards, you are performing maintenance as much as finishing.
The Oiling Procedure
The wood needs to soak up a lot of oil the first time. Be generous!
- Initial Saturation: Pour liberal amounts of food-grade mineral oil directly onto the dry, fully sanded board.
- Spread and Wait: Use a clean cloth or paper towel to spread the oil evenly over the entire surface (top, bottom, and sides).
- Soak Time: Let the board sit for at least 30 minutes, or even several hours. You will see the oil soak in.
- Reapply: Apply more oil wherever the wood still looks dry or thirsty. Repeat this process until the wood stops absorbing the oil quickly.
- Wipe Off Excess: After the final application, wait about 15 minutes, then thoroughly wipe off all excess oil with a clean, dry cloth. An oily surface will become sticky.
- Wax Finish (Optional): If using a wax paste, apply a thin layer after the final oil coat has dried (at least 24 hours). Buff the surface with a clean cloth until it shines.
Your board is now ready! Regular re-oiling (once a month or whenever it looks dry) keeps it looking new.
Advanced Techniques and Related Projects
Once you master the basic edge grain construction, you might explore more complex designs or other kitchen utensil making projects.
Advanced Grain Patterns
If you built an end grain board, you have already tackled advanced geometry. For edge grain boards, you can create checkerboard patterns or chevron designs by carefully cutting and re-gluing pieces at angles (like 45 degrees). These designs are visually stunning but require extremely precise cuts to ensure the glue lines close properly.
Incorporating Feet and Handles
To improve usability, consider adding rubber feet to the bottom. These prevent the board from slipping during heavy use.
- Drill shallow holes into the bottom corners.
- Glue small, non-slip rubber feet into these holes.
Handles can be made by routing out hand-holds on the sides or by attaching metal handles with specialized hardware (use washers to keep metal from touching the wood directly, which can cause staining).
Maintenance: Keeping Your Board in Top Shape
Maintenance is key to a long-lasting cutting board.
- Cleaning: Wash by hand with warm, soapy water immediately after use. Do not soak the board in water.
- Dishwasher Warning: Never put a wooden cutting board in the dishwasher. The high heat and prolonged moisture will cause rapid cracking and warping.
- Sanitizing: If you need to sanitize the board (especially after cutting raw meat), use a weak solution of white vinegar or a very dilute bleach solution (one teaspoon of bleach per quart of water). Rinse thoroughly afterward and dry immediately. Then, re-oil when dry.
Reviewing the Steps for Building a Butcher Block
If your goal is truly building a butcher block style surface, focus heavily on the thickness and the end grain orientation. Butcher blocks are typically very thick (1.5 inches or more) to allow for years of heavy sanding and flattening without compromising structural integrity.
| Step | Key Focus Area | Success Factor |
|---|---|---|
| Wood Selection | Dense Hardwoods (Maple, Oak) | Food Safety & Durability |
| Milling | Flat & Square Faces | Tight Glue Joints |
| Gluing/Clamping | Waterproof Glue (Titebond III) | Even Pressure Application |
| Flattening | Router Sled or Planer | Parallel Surfaces |
| Finishing | Food-Grade Mineral Oil | Saturation and Buffing |
FAQ About DIY Cutting Boards
Can I use reclaimed wood for a cutting board?
Yes, you can use reclaimed wood, but you must exercise extreme caution. Ensure the wood has not been treated with toxic chemicals (like chromated copper arsenate, often used on older pressure-treated lumber). Always mill the wood thoroughly to remove all old finish and potentially contaminated surface layers.
How thick should a good cutting board be?
A standard edge grain board should be at least 3/4 inch thick. For high-quality or building a butcher block style, aim for 1.5 to 2 inches thick. Thicker boards resist warping better.
How often should I oil my cutting board?
Initially, oil it heavily until it stops absorbing oil. After that, re-oil every month or whenever the board starts to look dull, dry, or lighter in color. Boards used frequently for wet tasks need more oiling.
Is polyurethane safe for a cutting board?
Polyurethane is generally not recommended for the primary cutting surface because it is not porous and will eventually scratch and chip away, exposing the raw wood underneath. If you use polyurethane, only use it on the sides or bottom, and ensure it is a food-safe variety, though mineral oil remains superior for the main surface.
Why is my new board warping after assembly?
Warping usually happens for two reasons: insufficient glue pressure (leaving gaps that draw in moisture unevenly) or, more commonly, only finishing/oiling one side. A cutting board must be oiled on both the top and bottom sides equally to maintain moisture balance and prevent one side from drying out faster than the other.