
Yes, you can definitely re grout kitchen sink tiles yourself! DIY kitchen sink regrouting is a manageable project for most homeowners. This guide will walk you through every step needed for successful kitchen sink tile grout repair and give your sink area a fresh, clean look.
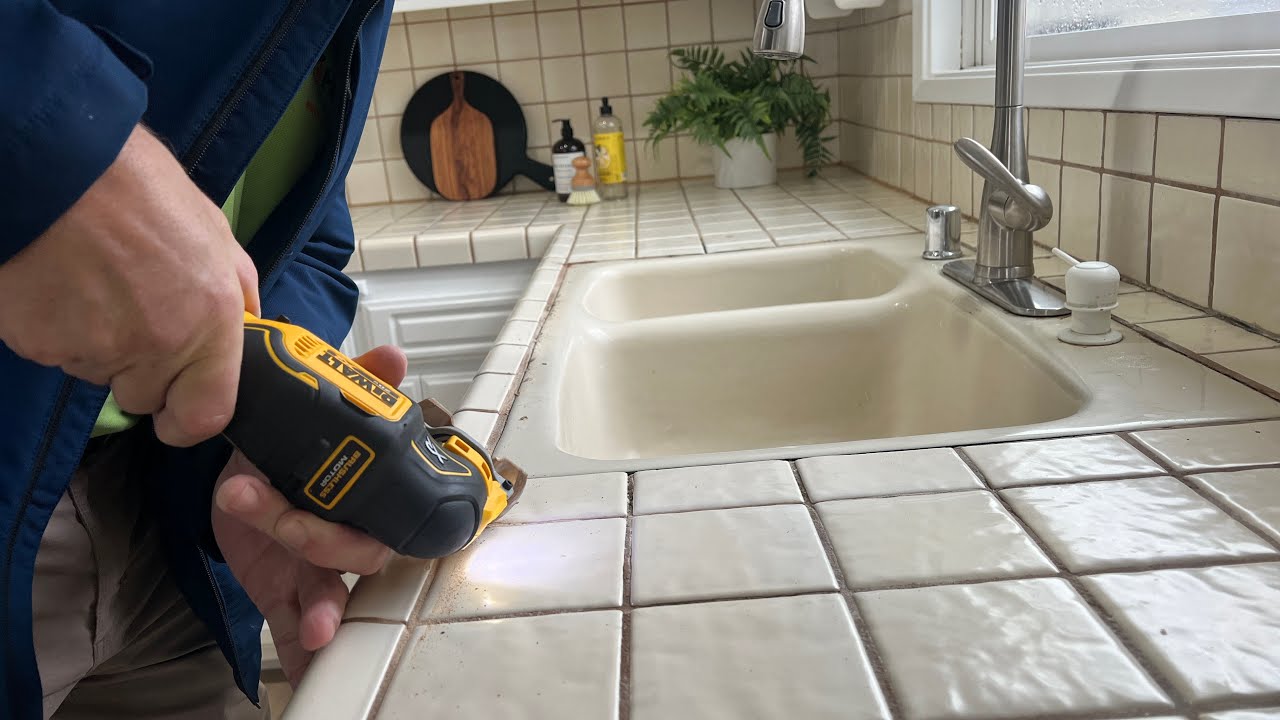
Image Source: i.ytimg.com
Why Re Grout Your Kitchen Sink Tiles?
Over time, the grout around your kitchen sink takes a beating. Water splashes constantly. Food acids attack it. Soap scum builds up. This leads to cracking, crumbling, and discoloration. Old, dirty grout looks bad. More importantly, damaged grout lets water sneak behind the tiles. This can cause mold growth or damage the wall structure underneath. Replacing old sink grout not only improves looks but also protects your home. How to refresh sink tile grout starts with removing the old, tired stuff.
Prepping for the Job: Tools and Materials
Gathering the right supplies makes the job much faster. You need tools for taking out the old grout and materials for putting in the new. Good preparation is key to effective grouting around kitchen sink edge.
Essential Tools for Regrouting Sink Tiles
Here is what you will need:
- Grout Removal Tool: This is crucial. You can use a manual scoring tool, a utility knife, or an oscillating multi-tool with a grout removal blade. The power tool is faster but requires more care.
- Safety Gear: Safety glasses are a must. Wear gloves to protect your hands from dust and chemicals. A dust mask or respirator is wise.
- Scrub Brush or Stiff Nylon Brush: For cleaning surfaces after removal.
- Vacuum Cleaner: A shop vac works best to suck up all the old grout dust.
- Sponge and Bucket: For cleaning the tiles during the grouting process.
- Grout Float: A rubber-soled tool used to press the new grout into the joints.
- Margin Trowel: For scooping grout onto the float.
- Caulk Finishing Tool (Optional): Helps smooth the final sealant line.
Choosing the Right Materials
The best grout for kitchen sink areas needs to resist water and stains.
| Material | Type Recommendation | Notes |
|---|---|---|
| Grout | Unsanded or Sanded Latex Grout | Use unsanded for narrow joints (less than 1/8 inch). Sanded grout is stronger for wider joints. Pre-mixed grout is easier for DIYers. |
| Caulk/Sealant | 100% Silicone Caulk | This is vital for sealing the joint where the tile meets the sink lip. Silicone is flexible and waterproof. |
| Grout Sealer | Penetrating Sealer | Used after the new grout cures to help with waterproofing kitchen sink grout lines. |
Step 1: Removing Old Sink Grout
This is often the hardest part of the job. You must thoroughly complete removing old sink grout for the new grout to stick well.
Safety First
Put on your safety glasses and gloves. Grout dust can irritate your lungs and eyes.
The Removal Process
- Score the Lines: If you have a manual tool, push it firmly down the center of the grout line. Work slowly. If you use an oscillating tool, set the speed to low or medium. Hold the tool at a slight angle over the joint.
- Go Slow Near the Sink Edge: Be extremely careful when working near the sink basin or countertop surface. If you slip, you can scratch or chip the sink material (like porcelain or granite). We are aiming to remove only the grout, not the tile or the surface beneath.
- Target Depth: You only need to remove about two-thirds of the old grout depth. Aim for about 1/8 inch deep. Removing it all risks chipping the tile edges.
- Clean Up: Once a section is scored, use a vacuum to suck up the dust immediately. Sweep or brush away debris. Do this often as you work.
Tip: If the grout is very hard, misting it lightly with water an hour before starting can sometimes soften it slightly, making removal easier.
Step 2: Cleaning and Drying the Area
A clean surface is necessary for proper adhesion. New grout will not stick to dust, soap scum, or moisture.
Deep Cleaning the Joints
- Scrubbing: Use a stiff nylon brush dipped in a mild solution of water and bleach or white vinegar. Gently scrub inside the empty grout channels. This kills any hidden mold or mildew spores.
- Rinsing: Wipe down the entire tiled area with clean water. Make sure no cleaning solution residue remains.
- Drying Time: This step is very important for waterproofing kitchen sink grout lines. The area must be completely dry before applying new grout. Depending on humidity, this might take 12 to 24 hours. You can speed this up by using a hairdryer on a low setting, focusing on the joints.
Step 3: Mixing and Applying the New Grout
Follow the manufacturer’s instructions exactly when mixing powdered grout. Too much water weakens the final product. Pre-mixed grout skips this step but can be more expensive.
Mixing Grout
- Powdered Grout: Add water slowly to the powder while mixing constantly. The goal is a consistency like thick peanut butter—it should hold its shape on a margin trowel but still be spreadable. Let it slake (rest) for about 5–10 minutes before using. Remix gently before application.
Applying Grout
- Working in Sections: Do not try to grout the entire sink area at once. Work in small sections, perhaps one square foot at a time.
- Loading the Float: Scoop a manageable amount of grout onto the grout float using a margin trowel.
- Forcing it In: Hold the float at a 45-degree angle to the tile surface. Press the grout firmly into the joints. You want to ensure the gaps are completely filled. Move diagonally across the tiles. This diagonal motion helps push the grout deep into the gaps.
- Scraping Excess: Once the joint is filled, tilt the float to a steeper angle (about 70 degrees). Drag the edge of the float across the tile surface to remove the excess grout. You want the grout to be flush with the tile edges, but not smeared widely across the tile faces.
Step 4: Cleaning Excess Grout (The First Wash)
This step must be done quickly after applying the grout, usually within 15 to 30 minutes, depending on the product and room temperature.
- Initial Wipe: Use a large, damp (not soaking wet) sponge. Gently wipe the tile surface in a circular motion. Rinse the sponge frequently in clean water. Your goal here is to clean the face of the tiles without pulling the fresh grout out of the joints.
- Shaping the Grout: As you wipe, the sponge helps smooth and slightly compact the grout surface within the joints. Pay special attention to the corners near the sink edge, making sure the transition is clean.
Step 5: Final Cleaning and Haze Removal
After the grout has set for about an hour or two, a light, dusty film called “grout haze” will appear on the tiles.
- Wait for Haze: Let the grout firm up a bit more. If you clean too soon, you will pull the grout out.
- Second Sponge Pass: Dampen a clean sponge lightly. Wipe the tiles again, using straight passes now instead of circles. Change your rinse water often. You want the tiles to shine again.
- Buffing: Once the grout feels firm to the touch (usually after 24 hours), use a clean, dry cloth or cheesecloth to buff off any remaining stubborn haze.
Step 6: Sealing the Grout and Caulking the Edge
This final phase ensures your kitchen sink tile grout repair lasts a long time and remains waterproof.
Sealing Kitchen Sink Grout
Sealing kitchen sink grout is essential because grout is porous. Sealer fills these tiny pores, stopping water, oil, and stains from soaking in.
- Curing Time: Check your grout packaging. Most cement-based grouts need 48 to 72 hours to cure fully before sealing. Do not seal too early!
- Application: Apply the penetrating sealer according to the directions. Usually, you brush or lightly spray it onto the grout lines only. Wipe any excess sealer off the tile face immediately, as it can leave a residue that is hard to remove later.
- Second Coat: Many high-traffic or wet areas benefit from a second coat applied about an hour after the first coat dries. This boosts your waterproofing kitchen sink grout lines.
Caulking the Sink Joint
This is the final, critical barrier against water damage. Grouting around kitchen sink edge must always be finished with a flexible sealant, never hard grout. Hard grout will crack immediately when the sink expands or contracts with temperature changes or when you press on it.
- Remove Old Caulk: Use a utility knife or specialized caulk remover tool to scrape out every bit of the old sealant around the perimeter where the tile meets the sink lip. Clean this joint thoroughly with rubbing alcohol to remove all grease or soap residue.
- Apply Silicone Caulk: Use 100% silicone caulk, as it adheres best and resists mold. Cut the tip of the caulk tube at a 45-degree angle. Start applying a continuous bead where the tile wall meets the sink flange.
- Tooling the Bead: Immediately after applying the caulk, use a caulk finishing tool or a gloved finger dipped in mineral spirits (or soapy water, check caulk instructions) to smooth the bead into a concave shape. This forces the caulk into the gap, creating a watertight seal.
- Drying: Allow the silicone to cure completely before exposing it to heavy water use. This usually takes 24 hours.
Maintenance Tips for Long-Lasting Sink Grout
Once your DIY kitchen sink regrouting project is complete, smart care will keep it looking great.
- Wipe up large spills immediately.
- Avoid using harsh, abrasive cleaners directly on the grout lines. Stick to mild, pH-neutral tile cleaners.
- If you notice the grout looking dull or absorbing water after a few years, it’s time to clean thoroughly and reapply the grout sealer.
Summary of Key Considerations for Sink Grout
The sink area sees the most moisture and abrasion. Keep these points in mind:
- Removal Quality: Poor removing old sink grout leads to weak new grout.
- Drying Time: Never rush drying before sealing or caulking.
- Sealant Choice: Use 100% silicone caulk only where tile meets the sink basin.
Frequently Asked Questions (FAQ)
Q: Can I grout directly onto old, clean grout?
A: No. You should always remove the old grout first. New grout needs a deep, clean channel to bond properly. Simply applying new grout over old grout is a temporary fix that will fail quickly, especially in wet areas like a sink. This project requires removing old sink grout for success.
Q: What type of grout is the best grout for kitchen sink applications?
A: For most kitchen sink tile installations where joints are narrow (1/8 inch or less), unsanded grout is preferred because it is smoother and less likely to scratch the tile glaze. However, if the joints are wider, use a high-quality, epoxy-based, or polymer-modified sanded grout for better durability and less shrinking. Always follow up with quality sealing kitchen sink grout.
Q: How long does it take to re grout around the kitchen sink edge?
A: The actual application time is usually only 1–3 hours, depending on the size of the area. However, the total time including removal, drying, curing before sealing, and sealing/caulking can take 3 to 5 days because you must wait for each step to fully cure before moving to the next.
Q: My tiles are slightly uneven. Should I use sanded or unsanded grout?
A: If your tiles are uneven or the grout lines vary widely in width, sanded grout is usually the better choice. Sand provides structural stability to the mix, preventing cracking in wider gaps that can result from uneven tile setting.
Q: My old grout crumbled out easily. Does this mean my kitchen sink tile grout repair will be easier?
A: Yes, crumbly grout means the seal has already broken down, making removing old sink grout much simpler. However, it also signals significant moisture penetration, so ensure the area underneath is dry before you begin DIY kitchen sink regrouting.