
Kitchen tile grout cleaning can be a big chore, but cleaning it fast is possible with the right tools and methods. The best grout cleaner for kitchen floors often depends on the type of stain, but simple household items can handle most daily messes quickly.
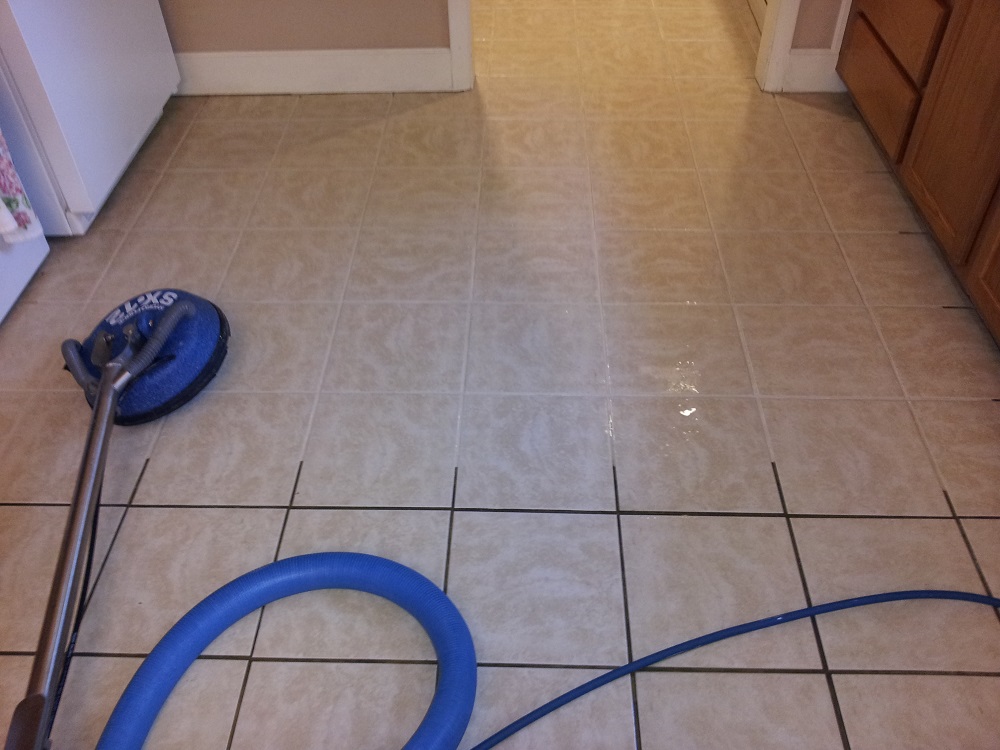
Image Source: www.myheavensbest.com
Why Kitchen Grout Gets So Dirty
Kitchen floors see a lot of traffic. They are also where spills happen most often. Food grease, oil splatters, wine drips, and general dirt all get trapped in the porous grout lines. Grout is like a sponge for grime. Because it is rougher than the tile itself, dirt sticks easily. This makes kitchen tile grout cleaning feel endless. Removing trapped soil and oil buildup requires more than just a quick mop.
Quick Fixes: Cleaning Grout in Minutes
For light, surface-level dirt, speed is key. These methods use things you likely already have at home. They are great for daily or weekly touch-ups.
The Baking Soda Paste Method (Fastest Basic Clean)
Baking soda is a mild abrasive. It lifts stains without scratching tiles or grout.
Steps for Quick Cleaning
- Mix the Paste: Mix baking soda with a small amount of water. You want a thick paste, like toothpaste.
- Apply: Dab the paste directly onto the grout lines.
- Wait Briefly: Let it sit for five minutes. Do not let it dry completely.
- Scrub Gently: Use an old toothbrush or a small stiff brush. Scrub in a circular motion. This is the main part of how to scrub kitchen floor grout quickly.
- Wipe Clean: Wipe the area with a damp cloth. Rinse the cloth often.
Vinegar Spray for Mild Disinfecting
White vinegar is a great natural grout cleaner kitchen option. It helps break down mineral deposits and mild soap scum.
Using Vinegar Effectively
- Mix equal parts white vinegar and warm water in a spray bottle.
- Spray the mixture generously over the grout lines.
- Let it sit for 10 to 15 minutes. The acid works to break down dirt.
- Scrub lightly with a brush.
- Rinse the floor well with plain water. This step is very important. Vinegar left too long can harm some types of natural stone tile.
Tackling Tough Stains: Removing Grease from Kitchen Floor Grout
Grease is the biggest challenge in kitchen grout. Oil spatters from cooking soak in deep. You need a product that can cut through this oily layer.
Dish Soap and Hot Water Power
Heavy-duty dish soap is designed to emulsify grease. This makes it a fantastic choice for removing grease from kitchen floor grout.
- Prep the Area: Sweep or vacuum the floor first.
- Mix Strong Solution: Mix one part very hot water with one part grease-cutting dish soap.
- Apply Heavily: Use an old sponge or cloth to apply the hot, soapy mixture directly onto the grout. Soak the grout lines.
- Dwell Time: Let this sit for 15 to 20 minutes. Heat and soap work together to loosen the oil.
- Agitate: Use a firm nylon brush or a specialized grout brush to scrub the lines vigorously.
- Rinse Well: Wipe away the soapy residue using clean, hot water. You may need several passes with a clean rag.
Oxygen Bleach for Deep Stains
For dark stains that remain after soap treatment, oxygen bleach (like OxiClean) is often the grout stain remover kitchen floor professionals recommend for tough organic matter. It lightens stains without the harshness of chlorine bleach.
- Mix oxygen bleach powder with hot water according to the package directions. Make a thick paste.
- Apply the paste directly to the stained grout.
- Allow it to sit for at least 30 minutes, or longer for set-in stains. Do not let it dry out. Keep it moist by misting with water if needed.
- Scrub hard.
- Rinse thoroughly.
Deep Cleaning Kitchen Floor Grout: When Mops Aren’t Enough
When the entire floor looks dull, it’s time for deep cleaning kitchen floor grout. This takes more time but yields the best results.
Commercial Grout Cleaners
Sometimes, homemade solutions are not enough. Several powerful commercial products are available. Always check the label to make sure the product is safe for your type of tile (ceramic, porcelain, or natural stone).
Choosing the Right Commercial Cleaner
| Cleaner Type | Best For | Key Features | Caution |
|---|---|---|---|
| Acid-Based Cleaners | Hard water stains, mineral buildup. | Strong etching action. | NEVER use on natural stone (marble, travertine). |
| Alkaline (Enzymatic) Cleaners | Grease, heavy oil buildup. | Breaks down organic matter safely. | Requires longer dwell time. |
| Hydrogen Peroxide Based | Brightening, disinfecting kitchen floor grout. | Kills mold/mildew spores. | Can cause slight lightening of colored grout. |
The Power of Steam Cleaning
Steam cleaning kitchen floor grout is one of the fastest, most effective deep cleaning methods. A good steam cleaner injects high-temperature, pressurized steam directly into the grout pores.
- How it Works: The heat instantly loosens dirt, kills bacteria, and dissolves grease deposits without harsh chemicals.
- Speed: It is fast because you scrub immediately behind the steam nozzle.
- Process: Attach the narrow jet nozzle to your steam cleaner. Pass it slowly over the grout lines, following immediately with a cloth or brush attachment to wipe up the residue.
How to Scrub Kitchen Floor Grout Like a Pro
The tool you use to scrub makes a huge difference in how fast you clean. A simple toothbrush is fine for small areas, but for large floors, you need something stronger.
Best Scrubbing Tools
- Stiff Nylon Brush: This is the standard tool. Ensure the bristles are stiff enough to penetrate the texture of the grout.
- Grout Brush with Handle: These brushes often have U-shaped bristles perfectly sized for grout lines. They save your knees since you don’t have to kneel.
- Electric Scrubber/Drill Brush Attachment: If you have a very large kitchen or deeply set grime, an electric spin brush attachment for a power drill can do the scrubbing work for you. Use lower speeds to avoid splashing chemicals.
Tip for Scrubbing: Always scrub with the grain of the grout line, not across it. This pushes the dirt out of the line rather than just smearing it sideways.
Maintaining Clean Grout: Prevention is Faster Than Cleaning
The best way to clean fast is to clean less often. Prevention stops stains from setting deep.
Daily Wipes
After heavy cooking days, quickly wipe down the floor with a damp mop using just hot water. Don’t let grease sit overnight.
Immediate Spill Cleanup
Wipe up spills immediately. Do not let acidic liquids like tomato sauce or wine sit on the grout for more than a few minutes. Blot, don’t wipe, to lift the spill out of the porous grout.
Sealing Kitchen Floor Grout After Cleaning
This step is crucial for long-term speed and cleanliness. Grout sealant fills in the microscopic holes in the grout. This prevents liquids, grease, and dirt from soaking in.
When to Seal
If you have just completed a deep cleaning kitchen floor grout session, you must wait until the grout is completely dry (usually 24 to 72 hours).
Applying the Sealant
- Choose the Right Type: Use a high-quality, penetrating sealer made for kitchen environments.
- Apply Carefully: Use a small foam brush or applicator designed for grout lines. Apply the sealant only to the grout, wiping any excess off the tile surface immediately.
- Cure Time: Allow the sealer to cure completely, following the manufacturer’s directions, before walking on or mopping the floor. A properly sealed floor will repel spills, making future cleaning much faster and easier.
Advanced Stain Removal Techniques
Some stains require targeted treatment before the general clean.
Dealing with Red Wine or Juice Stains
These organic stains respond well to hydrogen peroxide.
- Create a thick poultice: Mix powdered laundry detergent (without bleach) or baking soda with 3% hydrogen peroxide until it forms a thick paste.
- Cover the stain completely with the paste.
- Cover the paste with plastic wrap. Tape the edges down.
- Leave it overnight (8 to 12 hours). The peroxide bleaches the stain while the poultice draws the color up.
- Scrub and rinse clean the next day.
Erasing Rust Marks
Rust spots often come from metal cans left on a wet floor. Acid is needed, but use it with extreme care.
- Use a commercial rust remover labeled as safe for grout, or a mild solution of distilled white vinegar applied locally.
- Apply with a cotton swab, only touching the rust spot.
- Rinse very quickly—within one minute—with clean water to stop the acid from etching the grout or tile.
Comparing Cleaning Speeds: A Summary Table
To help you choose the fastest effective method, here is a comparison based on typical cleaning scenarios.
| Scenario | Recommended Method | Estimated Time (for 100 sq ft) | Chemical Use |
|---|---|---|---|
| Light Dust/Daily Grime | Baking Soda Paste & Quick Scrub | 15 – 25 minutes | Low (Natural) |
| Heavy Grease Buildup | Dish Soap Soak & Vigorous Scrubbing | 45 – 60 minutes | Moderate |
| Deeply Embedded Dirt/Mold | Steam Cleaning | 30 – 45 minutes | None |
| Set-in Dark Stains | Oxygen Bleach Paste Soak | 60+ minutes (mostly wait time) | Moderate |
Final Steps: Disinfecting Kitchen Floor Grout
After removing the visible dirt, you might want to ensure your grout is truly clean, especially in high-spill zones.
Most general cleaners (like vinegar or oxygen bleach) offer some level of disinfection. However, for maximum peace of mind, use a commercial disinfectant approved for floors after your primary cleaning.
Always follow label directions for dwell time. Disinfectants need time on the surface to kill germs effectively. After the dwell time, a final rinse with clean water is essential to remove any chemical residue that might attract dirt faster later.
Frequently Asked Questions (FAQ)
Can I use chlorine bleach on my kitchen floor grout?
Yes, you can use diluted chlorine bleach for disinfecting kitchen floor grout, especially if you suspect mold or mildew. However, use it sparingly. Mix one part bleach to ten parts water. Never mix bleach with vinegar or ammonia, as this creates toxic gas. Bleach can also weaken grout over time and may lighten colored grout permanently.
What is the easiest way to remove black spots from kitchen grout?
Black spots are usually mildew or deeply embedded dirt. The easiest method is often a strong paste of oxygen bleach and hot water, allowed to sit for an hour, followed by scrubbing with a stiff brush. If the spots don’t lift, try targeted steam cleaning kitchen floor grout over the specific areas.
How often should I clean my kitchen grout?
For the best look and easiest maintenance, aim for a light clean (baking soda or vinegar) weekly. A thorough deep cleaning kitchen floor grout should happen every one to three months, depending on how much you cook and spill.
My grout is eroding. What should I do before cleaning?
If your grout is crumbling or falling out, stop using harsh acids or vigorous scrubbing immediately. Eroded grout cannot hold sealant and needs repair. Clean the area gently with mild soap and water first, let it dry completely, and then use a grout repair caulk or mix new grout to fill the gaps before applying any sealant. Cleaning loose grout will only make the problem worse.