
What is the best way to clean kitchen floor grout? The best way to clean kitchen floor grout often involves a combination of a good grout cleaning solutions, elbow grease, and the right tools, whether you choose a commercial product or a DIY grout cleaning mix.
Kitchen floors take a lot of abuse. Spills, grease, and daily foot traffic quickly turn light-colored grout lines dark and dingy. If you are tired of looking at those dark lines, it is time to tackle the job. Cleaning grout doesn’t have to be hard. We will show you simple steps for deep cleaning dirty grout lines.
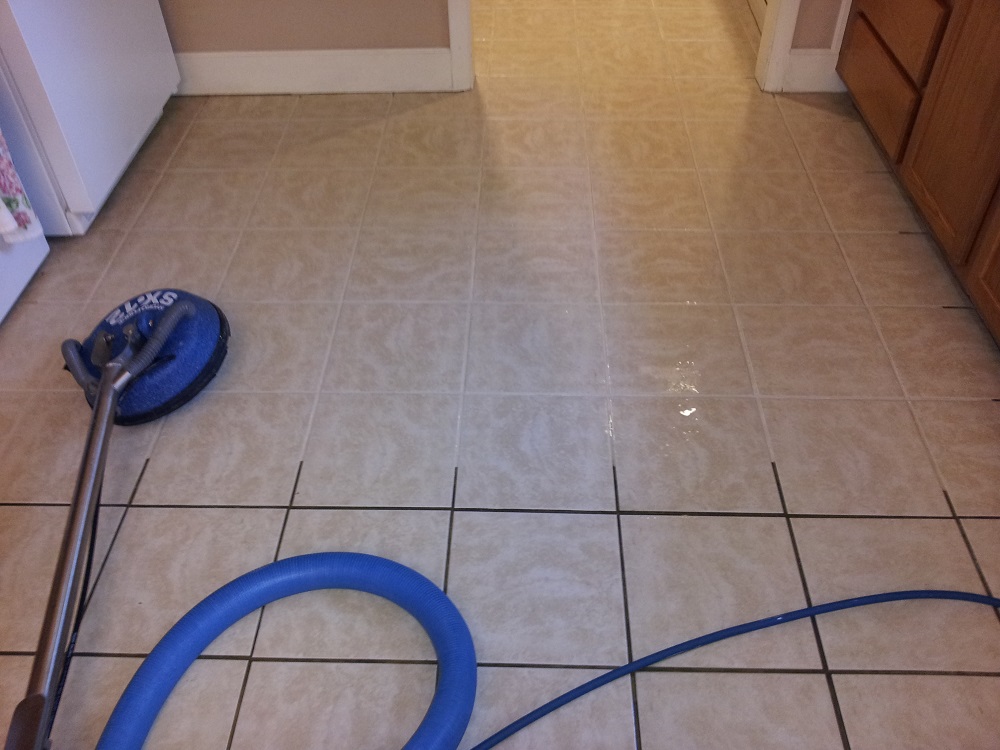
Image Source: www.myheavensbest.com
Why Kitchen Grout Gets So Dirty
Grout fills the gaps between your kitchen tiles. It is porous, like a sponge. This means it soaks up dirt, grease, and spills easily. Over time, this trapped grime makes the grout look black or brown. Moisture in the kitchen, from washing dishes or mopping, can also lead to mold or mildew growth in the grout lines. Cleaning it regularly is key to keeping your kitchen looking fresh.
Gathering Your Cleaning Arsenal
Before you start, make sure you have the right tools ready. Having everything on hand makes the job much faster.
Essential Tools for Grout Cleaning
- Stiff-bristled brush or an old toothbrush (for small areas)
- Grout brush (a specialized brush with thin bristles)
- Bucket for mixing solutions
- Old towels or rags
- Spray bottle (if using a spray solution)
- Safety gear: Gloves and safety glasses
Choosing Your Grout Cleaning Solutions
The right cleaner makes all the difference. You have several options, from strong chemicals to gentler, natural mixes. We will look at effective grout cleaning solutions for every situation.
Commercial Grout Cleaner Reviews
Many store-bought cleaners work very well. They often use stronger chemicals that break down tough grime quickly. Look for cleaners specifically made for tile and grout. Some popular types include:
- Oxygenated Cleaners: These use peroxide or similar chemicals. They are good for lifting stains without being overly harsh on the grout itself.
- Acid-Based Cleaners: Use these only on unsealed or very dirty, durable tile (like ceramic or porcelain). Never use acid cleaners on natural stone like marble or travertine, as they can etch (dull) the surface. Always test these in a hidden spot first.
- Alkaline Cleaners: These are strong degreasers. They work well in kitchens where grease buildup is common.
When reading grout cleaner reviews, look for comments about how well the product handles mildew and grease.
Natural Grout Cleaners: The DIY Approach
If you prefer avoiding harsh chemicals, DIY grout cleaning methods are excellent, especially for routine cleaning. These natural grout cleaners are safer for pets and kids.
Vinegar and Baking Soda Paste
This is the classic DIY grout cleaning method. Baking soda is a mild abrasive. Vinegar (a mild acid) reacts with the baking soda to create a lifting foam.
How to Make the Paste:
- Mix one part water with one part hydrogen peroxide (optional, for extra whitening).
- Slowly add baking soda until you get a thick paste, like frosting.
Hydrogen Peroxide Method
Hydrogen peroxide is a mild bleach alternative. It brightens grout without the harshness of chlorine bleach.
Simple Recipe:
- Mix equal parts hydrogen peroxide and baking soda. Apply directly to the grout lines.
Steam Cleaning
Steam cleaning is fantastic for deep cleaning dirty grout lines. The high heat sanitizes and loosens grime without any chemicals. You usually need a specialized steam mop with a grout attachment.
Step-by-Step Guide: How to Clean Kitchen Floor Grout
Follow these steps for the best results when scrubbing tile grout.
Step 1: Prepare the Area
Safety comes first! Clear everything away from the floor. Sweep or vacuum thoroughly to remove all loose dirt and debris. If you plan to use strong chemicals, open windows for ventilation and put on your gloves and glasses.
Step 2: Apply Your Chosen Cleaner
You must let the cleaner sit on the grime long enough to work. This soaking time is crucial.
- For Commercial Cleaners: Follow the bottle instructions exactly. Usually, you spray it on and let it sit for 5 to 15 minutes.
- For DIY Paste (Baking Soda): Apply the paste thickly directly onto the grout lines. Let it sit for at least 10 to 15 minutes. If it starts to dry out, lightly spray it with water or vinegar to keep it moist and active.
Step 3: The Power of Scrubbing Tile Grout
This is where the real effort comes in. You need friction to lift the trapped dirt.
- Use your stiff brush, a toothbrush for tight corners, or a dedicated grout brush.
- Work in small sections, about 3 feet by 3 feet.
- Apply firm pressure while scrubbing tile grout in short, back-and-forth motions, or circles, directly along the grout line. Avoid scrubbing the tile surface too much, as this can dull the finish.
- If using a steam cleaner, use the small brush attachment to agitate the softened dirt as you steam.
Step 4: Rinsing and Removing Grime
After scrubbing, you must rinse away all the cleaner residue and the lifted dirt. Leftover cleaner can attract more dirt later or damage the grout.
- Use a bucket of clean, warm water. Dip your mop or a clean rag into the water and wring it out well. The mop should be damp, not soaking wet.
- Mop or wipe down the tiled area thoroughly.
- Change the rinse water frequently. Dirty water just spreads the grime around.
- For tough residue, use a wet-dry vacuum to suck up the dirty rinse water directly from the floor. This is often faster and leaves less moisture behind.
Step 5: Dealing with Stubborn Stains
Sometimes, simple scrubbing isn’t enough for removing stains from tile grout. This is common with tough spots like spilled red wine, coffee, or cooking oil.
Tackling Heavy Stains
For these tough spots, you might need more targeted treatment:
- Poultice Method for Oil Stains: Oil stains soak deep. Create a thick paste using a solvent (like acetone or mineral spirits) mixed with an absorbent powder (like fuller’s earth or baking soda). Spread this thick paste over the stain. Cover it with plastic wrap and tape the edges down. Let it sit for 24 hours. The solvent draws the oil out, and the powder absorbs it. Scrape it up and clean the area.
- Targeted Whitening: For general discoloration, sometimes a very diluted solution of oxygen bleach (like OxiClean) left on the stain for 30 minutes can help lift the color before scrubbing. Always rinse thoroughly after using oxygen bleach.
Specialized Situations: Different Types of Grout
Not all grout is the same. The way you clean depends on the material.
Cementitious Grout
This is the most common type. It is porous and easily stained. It handles most cleaning methods well, but avoid harsh acids if you notice it crumbling or deteriorating.
Epoxy Grout
Epoxy grout is non-porous and highly resistant to stains and chemicals. It is common in kitchens and bathrooms because it is very durable.
- Cleaning Epoxy Grout: You rarely need heavy scrubbing. A simple spray of mild dish soap and water followed by a quick wipe usually works. Strong acids or abrasives are unnecessary and can potentially dull the epoxy finish over time.
How to Prevent Future Grime Buildup
The best defense against dirt is a good offense. After you finish deep cleaning dirty grout lines, you need to protect them.
Sealing Grout After Cleaning: The Protective Layer
Once your grout is spotless and completely dry (wait at least 24 hours after the final rinse), you must apply a sealer. Sealing grout after cleaning is vital for kitchen floors. A good sealant fills the microscopic pores, preventing liquids, grease, and dirt from soaking in.
Why Sealing Matters
- It makes future spills bead up on the surface.
- It cuts down on your future cleaning time dramatically.
- It preserves the look of your freshly cleaned grout.
Applying Grout Sealer
- Purchase a high-quality, penetrating grout sealer. Make sure it is suitable for your type of floor tile (check if you need a topical or impregnating sealer).
- Use a small brush or applicator to paint the sealer directly onto the grout lines, avoiding the tile surface as much as possible.
- Wipe off any excess sealer from the tile surface immediately with a clean rag before it dries there.
- Allow the sealer to cure according to the product directions (usually several hours or overnight) before mopping or walking on the floor heavily.
Most sealers need reapplying every 1 to 3 years, depending on traffic and how often you clean.
When to Call in the Experts
Sometimes, DIY effort isn’t enough. If your grout is severely stained, crumbling, or you simply lack the time or energy, it might be time to consider professional grout cleaning services.
Benefits of Professional Services
- Equipment: Professionals use high-powered equipment, often including hot water extraction systems that clean deeper than household tools.
- Efficiency: They can clean a large kitchen floor much faster than you can.
- Restoration: If the grout is heavily damaged, they can sometimes repair or re-grout sections.
While professional grout cleaning services cost more upfront, they can restore grout that looks hopeless and save you hours of hard labor. They can also properly assess the best grout cleaning solutions for your specific flooring material.
Maintaining Clean Grout Between Deep Cleans
Regular maintenance keeps your grout looking good for longer. Aim to clean spills immediately. When you mop your kitchen floor, make sure your mop water is only slightly soapy and rinse well. Avoid using vinegar too often on cement-based grout, as repeated use can slowly etch it away.
Quick Maintenance Tips:
- Wipe up grease spills right away with a paper towel.
- Use a mop with a microfiber head, as they grab dirt better than traditional string mops.
- Keep a small spray bottle filled with diluted dish soap ready for quick spot cleaning.
Comparing Cleaning Methods Summary Table
| Method | Best For | Pros | Cons |
|---|---|---|---|
| Baking Soda Paste | Light to moderate dirt, DIY cleaning | Safe, inexpensive, natural | Requires heavy scrubbing |
| Commercial Cleaner | Deep stains, grease | Powerful, fast acting | Requires ventilation, potential for harsh chemicals |
| Steam Cleaning | Sanitizing, loosening embedded dirt | Chemical-free, deep clean | Requires specialized equipment |
| Professional Services | Severely damaged or large areas | Most powerful results, time-saving | Highest cost |
Frequently Asked Questions About Kitchen Grout Cleaning
Can I use bleach on my kitchen grout?
Yes, you can use diluted chlorine bleach if your grout is cementitious and unsealed. Mix one part bleach to three parts water. However, bleach can weaken the grout over time if used too often. It is also a harsh chemical and requires good ventilation. Natural grout cleaners are often a safer first choice.
How long does it take for grout sealer to dry?
Drying time varies based on the product and humidity. Generally, you should wait at least 4 to 6 hours before very light foot traffic, and 24 to 48 hours before heavy use or getting the floor wet again. Always check the specific instructions on the sealing grout after cleaning product you buy.
My grout is crumbling. Can I still clean it?
If the grout is severely crumbling, cleaning it will only make it worse. Crumbling grout needs to be removed and replaced (re-grouted). Strong grout cleaning solutions will just accelerate the damage. In this case, you need repair work, not just cleaning.
What is the fastest way to clean grout?
The fastest method, if you own the tools, is often steam cleaning, as the heat softens the dirt quickly, reducing the time spent scrubbing tile grout. For sheer speed without special tools, a strong commercial cleaner followed by aggressive scrubbing is usually next in line for quick results.
Does dish soap work for deep cleaning?
Dish soap is excellent for routine cleaning because it cuts grease well. For deep cleaning dirty grout lines, however, it often lacks the necessary scrubbing power or chemical action to lift years of embedded dirt. Use it for maintenance, but use stronger grout cleaning solutions for deep work.