
Can I fix my kitchen sink myself? Yes, most common kitchen sink issues, like slow draining or minor leaks, are simple enough for a homeowner to fix without calling a plumber immediately. This guide will show you how to handle these repairs.
This kitchen sink plumbing guide covers what to do when your sink acts up. We will look at several common kitchen sink problems. We will help you with troubleshooting kitchen sink issues step by step. Fixing a sink can save you time and money.
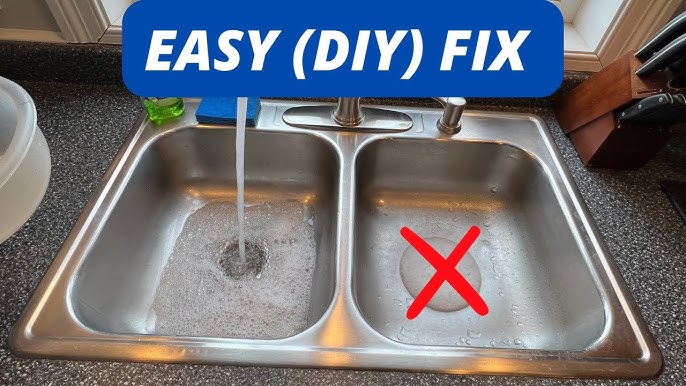
Image Source: i.ytimg.com
Dealing with Slow Draining Sinks
A sink that drains slowly is very common. Food bits, grease, and soap scum build up. This causes blockages. We will first focus on fixing a slow draining sink.
Simple Methods for Kitchen Sink Drain Cleaning
Before you reach for harsh chemicals, try these easy fixes. These methods often work well for minor clogs.
Using Hot Water and Dish Soap
This is the simplest first step. Hot water melts grease. Dish soap helps break down oils.
- Boil a large pot of water.
- Pour about half the hot water down the drain. Let it sit for a minute.
- Add a squirt of liquid dish soap.
- Pour the rest of the hot water slowly down the drain.
- Run the cold tap for a minute to check the flow.
The Baking Soda and Vinegar Power Duo
This mixture creates a fizzing action. This action helps loosen minor gunk in the pipes. This is a safer alternative to strong drain openers.
- Remove any standing water from the sink basin.
- Pour one cup of baking soda down the drain. Use a spatula to push it down if needed.
- Follow with one cup of plain white vinegar.
- Quickly cover the drain opening with a stopper or a wet rag. This traps the fizzing action inside the pipe.
- Let it work for 30 minutes.
- Flush the drain with very hot or boiling water.
Plunging Techniques for Unclogging a Kitchen Sink
A sink plunger creates suction. This force can dislodge the blockage. Make sure you use the right type of plunger. A flat-bottomed cup plunger works best for sinks.
- Fill the sink with enough hot water to cover the bottom of the plunger cup.
- If you have a double sink, seal the other drain opening tightly with a stopper or a wet cloth. This ensures full suction on the clogged side.
- Place the plunger over the clogged drain hole. Make a good seal.
- Plunge straight up and down firmly about 10 to 15 times. Keep the seal tight.
- On the last pull, yank the plunger up quickly.
- Check if the water drains quickly now. Repeat if necessary.
Advanced Kitchen Sink Drain Cleaning Using Tools
If plunging fails, it is time to check the pipes directly. You might need a drain snake or a good clean-out of the P-trap.
Cleaning Out the P-Trap
The P-trap is the curved pipe section directly under your sink. Debris often collects here. This is a prime spot for common kitchen sink problems.
Safety First: Place a bucket under the P-trap before you start. This catches water and debris. Wear rubber gloves.
- Locate the slip nuts on both ends of the curved pipe (the P-trap).
- Use channel-lock pliers or turn them by hand to loosen the slip nuts. Be gentle if they are plastic.
- Carefully remove the P-trap. Be ready for water to spill into the bucket.
- Inspect the trap for stuck food, grease, or debris. Clean it thoroughly with an old toothbrush or a wire hanger.
- Look inside the pipes leading away from the trap as well.
- Reassemble the P-trap. Make sure the slip nuts are hand-tightened firmly. Do not overtighten, especially on plastic pipes, as they can crack.
- Run water slowly at first to check for leaks around the slip nuts. Tighten slightly more if you see drips.
Using a Drain Snake (Auger)
A drain snake is a long, flexible metal cable. It helps you reach deeper clogs.
- Remove the P-trap first, as mentioned above. This gives you direct access to the drain line entering the wall.
- Feed the end of the snake cable into the exposed pipe leading into the wall.
- Push the cable slowly until you feel resistance—this is the clog.
- Lock the cable near the wall pipe opening.
- Crank the handle on the snake clockwise. This action helps the tip bore into the clog or snag the material.
- When you feel the resistance lessen, gently pull the cable back out. You might pull out the blockage material.
- Reattach the P-trap and run water to test the drain flow.
Solving Garbage Disposal Issues
Many modern kitchens have a garbage disposal. When it stops working or jams, it requires specific attention. This is part of kitchen sink disposal repair.
Disposal Is Humming But Not Turning
If you hear a low hum, the motor is trying to turn, but the blades are stuck. This is not a wiring issue; something is physically jamming it.
Crucial Safety Step: ALWAYS turn off the power to the disposal first. Either flip the wall switch off or turn off the circuit breaker dedicated to the disposal.
- Check the Switch: Ensure the wall switch is definitely in the ‘Off’ position.
- Use the Wrench: Most disposals have a small opening on the very bottom center of the unit. This is the flywheel access port.
- Insert the special Allen wrench (usually supplied with the disposal) into this hole.
- Crank the wrench back and forth vigorously. This manually rotates the flywheel and hopefully frees the stuck object.
- Remove the wrench.
- Check the access panel on the side of the disposal unit. Sometimes you can see what is jammed (like a bone or a piece of metal). Use tongs or pliers to remove it. Never use your hand.
- Restore power and test the disposal by running cold water and flicking the switch.
Disposal Will Not Turn On At All
If there is no sound, the unit has likely tripped its overload protector.
- Ensure the wall switch is on.
- Look underneath the disposal unit for a small red or black button. This is the reset button.
- Press this button firmly until you hear a click.
- Wait five minutes.
- Restore power and test again.
If the disposal still doesn’t work after resetting, the motor might be burned out, meaning you need a replacement or professional kitchen sink disposal repair.
Repairing Leaks Around the Sink Fixtures
Leaks cause water damage and can lead to mold. Repairing a leaky kitchen faucet is a common DIY task. Leaks can also occur at the base of the sink or where the drain pipes connect.
Fixing a Leaky Kitchen Faucet
Most faucet leaks stem from worn-out internal components like washers, O-rings, or cartridges.
Cartridge Faucets (Most Common Modern Type)
- Turn off the water supply lines under the sink. Look for the small shut-off valves. Turn them clockwise until tight.
- Remove the decorative cap on the handle (often a small plastic button).
- Unscrew the set screw holding the handle onto the faucet body. Remove the handle.
- You will see a dome-shaped cap or bonnet nut. Unscrew this carefully.
- Lift out the cartridge. Note its orientation—it must go back in the same way.
- Take the old cartridge to the hardware store to find an exact replacement.
- Install the new cartridge, ensuring it seats correctly.
- Reassemble the faucet parts in reverse order.
- Slowly turn the water supply valves back on and check for drips.
Leaks at the Base of the Spout
If water pools around the base where the spout swivels, the O-rings inside the base are likely worn.
- You must disassemble the spout from the faucet body (this varies by model).
- Carefully slide the spout off.
- Locate the old O-rings around the faucet base cylinder.
- Cut or pry off the old rings.
- Lubricate the new O-rings with plumber’s silicone grease before sliding them onto the cylinder.
- Reassemble the spout. The fresh grease and new rings will stop the seepage.
Fixing Leaks Under the Sink (Pipes and Connections)
Leaks under the sink usually involve the P-trap or the connection between the sink drain flange and the basin.
If the P-trap joint leaks after tightening:
- The slip nut washer or gasket is likely damaged or missing.
- Disassemble the joint, replace the worn plastic or rubber washer, and reassemble firmly.
If the main drain flange (where the basket strainer sits) leaks:
This requires sealing a kitchen sink drain basket.
- Clear everything out of the sink basin.
- From underneath the sink, unscrew the large locknut holding the drain basket assembly to the sink bowl.
- Pull the entire drain basket assembly up and out of the sink hole.
- Scrape away all the old putty or silicone from the underside rim of the drain flange and the sink opening. Clean both surfaces well.
- Roll a thick rope of plumber’s putty (about 1/2 inch thick) and press it firmly around the underside edge of the drain flange rim.
- Push the drain flange back into the sink hole from above, pressing down hard to squeeze out excess putty.
- From underneath, tighten the locknut firmly onto the tailpiece.
- Wipe away the excess putty that squeezed out around the drain opening inside the sink basin.
When It Is Time for a New Sink or Major Work
Sometimes, the issue is too severe for quick fixes. You might face severe corrosion, deep cracks, or outdated plumbing that cannot be fixed easily. This leads to the final step in our troubleshooting kitchen sink issues: replacing a kitchen sink.
Recognizing When Replacement is Necessary
- Deep Cracks or Chips: Composite or porcelain sinks with deep cracks cannot be reliably repaired and will eventually leak or fail structurally.
- Severe Corrosion: Rust penetrating the metal of stainless steel sinks compromises their integrity.
- Outdated Installation: Very old drop-in sinks might be sealed poorly or mounted in countertops that are no longer viable.
Overview of Replacing a Kitchen Sink
This is a larger job that often involves countertop removal or significant plumbing disconnection.
Undermount vs. Drop-in Sinks
The method of replacement depends on the sink type:
- Drop-in (Top-mount): The sink has a visible rim resting on top of the counter. They are generally easier to remove because you only need to break the sealant around the rim.
- Undermount: The sink is attached underneath the counter material. This requires removing clips and breaking the adhesive bond connecting the sink to the counter edge.
Key Steps in Sink Replacement
- Disconnect Plumbing: Shut off water valves. Disconnect the garbage disposal, drain lines, and supply lines from the old sink basin.
- Release the Old Sink:
- For drop-in sinks, use a utility knife to carefully slice through the old caulk or silicone sealant surrounding the rim.
- For undermount sinks, locate the mounting clips beneath the counter. Loosen and remove all clips.
- Gently pry the sink upward from below (or downward from above if it is a drop-in). You might need a helper as sinks are heavy.
- Prepare the Countertop: Thoroughly clean all old caulk, putty, and debris from the sink opening. The surface must be clean and dry for the new seal.
- Install the New Sink:
- Apply a fresh bead of 100% silicone sealant or plumber’s putty (depending on the manufacturer’s recommendation) to the underside rim of the new sink.
- Carefully lower the new sink into the opening, pressing down firmly to seat it and squeeze out the sealant.
- Secure mounting clips (for undermount sinks) or ensure the drop-in rim is firmly set. Wipe away excess sealant immediately.
- Reconnect Plumbing: Reinstall the drain assembly, garbage disposal, and water supply lines to the new sink basin. Connect all fittings firmly but do not overtighten.
- Cure and Test: Allow the sealant to cure for the time specified by the manufacturer (usually 12–24 hours) before running water or heavy use. Then, test all connections for leaks.
Maintaining Good Kitchen Sink Health
Prevention saves you from constant troubleshooting kitchen sink issues. Regular care keeps drains flowing and fixtures looking new.
Preventing Future Clogs
The best kitchen sink drain cleaning is preventative maintenance.
- Never pour grease or oil down the drain. Pour it into an old can and throw it in the trash once cool.
- Use a mesh strainer basket to catch food scraps before they go down.
- Once a month, run hot water mixed with a little baking soda down the drain to keep fats moving.
Faucet Longevity Tips
To avoid frequent repairing a leaky kitchen faucet, follow these care tips:
- Wipe down the faucet body regularly with a soft, damp cloth. Avoid abrasive cleaners that scratch chrome or nickel finishes.
- If you notice a slight drip, address it immediately by tightening the packing nut or checking the cartridge alignment before the washer completely fails.
| Problem Area | Most Likely Cause | Quick Fix Action |
|---|---|---|
| Slow Drain | Grease/Food buildup | Baking soda, vinegar, and hot water flush. |
| Humming Disposal | Jammed flywheel | Use the Allen wrench underneath to manually turn the motor. |
| Dripping Faucet | Worn internal cartridge/washer | Replace the cartridge or O-rings inside the handle mechanism. |
| Wet Cabinets Below | Loose P-trap connection | Tighten slip nuts or replace the internal gasket. |
| Leaking Drain Flange | Failed seal under the strainer | Remove the strainer, clean, and reapply plumber’s putty for sealing a kitchen sink. |
This comprehensive kitchen sink plumbing guide should equip you to handle most common household sink emergencies and maintenance tasks. Knowing when to proceed with unclogging a kitchen sink versus calling a professional is key to successful home repair.
Frequently Asked Questions (FAQ)
Q: How long should I let baking soda and vinegar sit before flushing?
A: For best results in kitchen sink drain cleaning, let the mixture sit and foam for at least 30 minutes. If the sink is severely clogged, you can let it sit for up to an hour before flushing with hot water.
Q: What is the safest chemical cleaner for a tough clog?
A: While chemical cleaners work, they can damage older pipes. Enzymatic cleaners are safer for the pipes and the environment for unclogging a kitchen sink. They use bacteria to eat away at organic buildup slowly. Avoid mixing any chemical cleaner with the vinegar/baking soda mix.
Q: My garbage disposal smells bad. How do I clean it?
A: You can clean a smelly disposal safely. Turn the power off. Drop a handful of ice cubes and a few lemon or orange peels into the disposal. Run cold water and turn the disposal on until the ice and peels are ground up. The ice scrubs the blades, and the citrus freshens the smell.
Q: What is the difference between putty and silicone for sealing a kitchen sink drain?
A: Plumber’s putty is soft and never truly hardens, making it easy to undo later. Silicone sealant creates a waterproof, hard bond and is often required for undermount sinks or sinks made of materials like granite or quartz that might stain from putty oils. Always check your new sink manufacturer’s recommendation.
Q: I tried plunging, but the water just backs up into the other side of my double sink. What gives?
A: This confirms the clog is past the garbage disposal and is affecting the main drain line shared by both basins. You must ensure the second, unclogged drain is sealed tightly when plunging the clogged side. If sealing doesn’t help, you will need to clean the P-trap or use a drain snake to reach the deeper blockage causing your fixing a slow draining sink issue.