
Can you install crown molding on kitchen cabinets yourself? Yes, you absolutely can install crown molding on kitchen cabinets as a DIY project. Many homeowners successfully complete installing crown molding on kitchen cabinets with basic tools and careful planning. This guide will walk you through every step of attaching cabinet crown molding to give your kitchen a custom, high-end finish. We focus on making kitchen cabinet top trim installation simple and achievable for everyone.
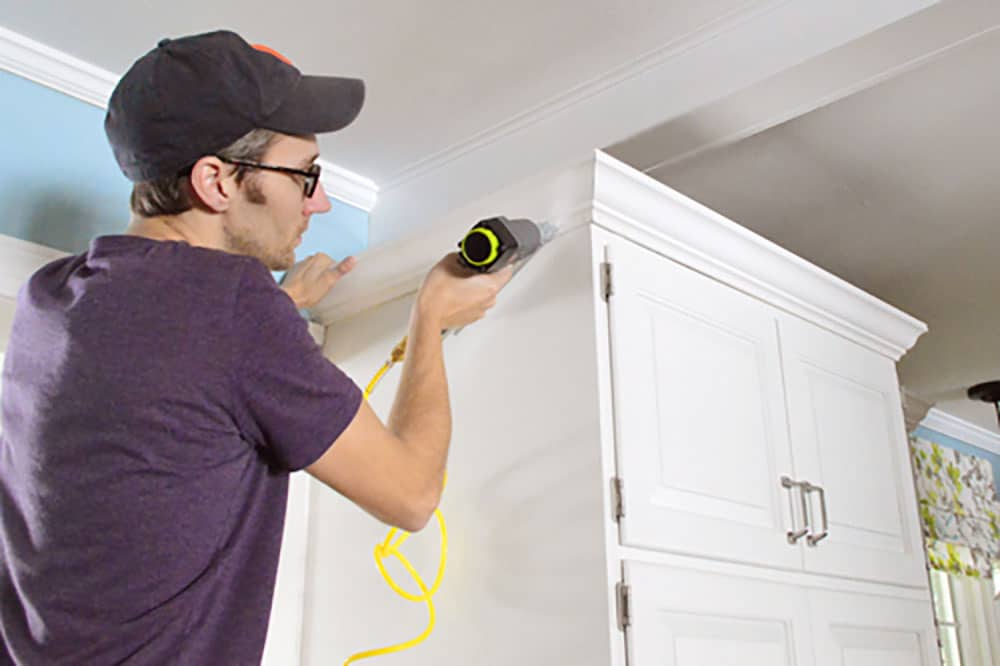
Image Source: www.younghouselove.com
Why Add Crown Molding to Cabinets?
Adding crown molding above your cabinets is a fantastic way to update your kitchen. It bridges the gap between the cabinet tops and the ceiling. This gap often collects dust and looks unfinished. Molding makes cabinets look taller and more built-in. It adds elegance and style without a full cabinet replacement. Finishing cabinet tops with molding instantly boosts curb appeal.
Tools and Materials Checklist
Before you start attaching cabinet crown molding, gather everything you need. Having all your supplies ready saves time later.
| Tool/Material | Purpose | Notes |
|---|---|---|
| Crown Molding Pieces | The decorative trim itself | Buy 10-15% extra for mistakes. |
| Miter Saw or Miter Box/Handsaw | For making precise angled cuts | A power miter saw is best for speed and accuracy. |
| Measuring Tape | For accurate measurements | Measure twice, cut once! |
| Pencil | For marking cuts | |
| Wood Glue or Best adhesive for cabinet crown molding | Securing joints and pieces | A good construction adhesive works well. |
| Finish Nails (1.5 to 2 inches) | Fastening molding to cabinets/walls | Use brad nails if using a nail gun. |
| Nail Gun (optional but recommended) | Driving nails quickly and neatly | Pneumatic or cordless options. |
| Caulk and Paint/Stain | Filling gaps and matching the finish | Color-matched caulk is key. |
| Safety Glasses and Ear Protection | Essential safety gear | Never skip safety items. |
| Stud Finder (if nailing into the wall) | Locating ceiling joists or wall studs |
Step 1: Planning and Measuring for Your Kitchen Cabinet Top Trim Installation
Accurate planning is the most important part of crown molding application for cabinets. Mistakes here lead to bad cuts later.
Measuring Cabinet Runs
Measure the length of the top of each cabinet run you plan to trim.
- Measure from the far left side to the far right side of the cabinet section.
- If the molding meets a wall at an inside corner, measure to the wall surface.
- If the molding meets an outside corner (like the end of a cabinet run against an open room), measure to the outside edge of the cabinet end panel.
- Add 10% to your total measurement. This extra material accounts for miscuts and waste during cutting crown molding for cabinets.
Selecting the Right Molding Profile
Not all crown molding is the same. Molding meant for ceilings is often too large for cabinets.
- Cabinet molding is usually flatter and smaller in depth. A typical cabinet molding depth is 2 to 4 inches.
- Choose a profile that matches the style of your existing kitchen cabinets. Traditional kitchens suit stepped or detailed profiles. Modern kitchens look better with simple, clean lines.
Deciding on Installation Angle
Standard ceiling crown molding is typically installed at 45-degree angles against the ceiling and the wall. However, mounting crown molding above cabinets often uses a simpler approach called the “spring angle.”
Most cabinet molding sits flat against the cabinet top and leans against the ceiling. If your ceiling is perfectly level, you can often set the molding on a slight angle (like 38 or 45 degrees) and secure it to the cabinet face frame and the ceiling.
Important Note: If you are mounting crown molding above cabinets where there is a large gap (over an inch) to the ceiling, you might need filler pieces or a different installation method. For this DIY cabinet crown molding guide, we assume a small gap, common in most kitchen installs.
Step 2: Mastering Cabinet Molding Corner Cuts
The magic, and the difficulty, of installing crown molding on kitchen cabinets lies in the corners. You will deal with inside corners (where two walls meet) and outside corners (where two sections of molding turn outward).
Setting Up Your Miter Saw for Cabinet Molding
Crown molding is often installed “flat” or “on the bevel” on the saw table. However, for the cleanest look, we cut it using the spring angle method.
If you lay the molding flat on the saw table, you must tilt the blade. This mimics how the molding sits in the corner against the wall and ceiling.
-
Inside Corner (Outside Turn): This cut is the most common. For a standard 90-degree corner, you need two pieces cut at opposing angles. If you set your saw to 45 degrees, one piece needs a 45-degree left miter and the other a 45-degree right miter.
-
Outside Corner (Inside Turn): These pieces will join together on the outside corner. You still cut them at 45 degrees, but they mirror each other differently than inside corners.
Cutting Crown Molding for Cabinets Using the Spring Angle Method
This method ensures the molding sits snugly against both surfaces (cabinet top and ceiling or adjacent wall).
- Determine Spring Angle: If your molding has a 45-degree ceiling angle, you tilt the blade to 45 degrees. If it has a 38-degree angle, you tilt the blade to 38 degrees. Check your specific molding profile, but 45 degrees is standard for many ceiling treatments.
- Inside Corner Cut:
- Set the saw bevel to your spring angle (e.g., 45 degrees).
- Set the saw miter to 45 degrees (opposite direction of the bevel tilt).
- Place the molding against the saw fence as it will sit against the wall/ceiling.
- Cut the first piece.
- For the second piece, keep the bevel the same, but reverse the miter angle (move the fence to the opposite 45-degree mark).
- Outside Corner Cut:
- Set the saw bevel to your spring angle (e.g., 45 degrees).
- Set the saw miter to 45 degrees (same direction as the bevel tilt).
- Cut the first piece.
- For the second piece, keep the bevel the same, but reverse the miter angle (move the fence to the opposite 45-degree mark).
Tip for Perfect Corners: Always cut a scrap piece first. Hold the two scrap pieces together to test the fit before cutting your actual molding. This confirms your angles are correct for cabinet molding corner cuts.
Step 3: Attaching Molding to Cabinets – The Mounting Crown Molding Above Cabinets Process
Once all your angled pieces are cut, it is time for mounting crown molding above cabinets. This usually involves securing the molding to the cabinet face frame, the cabinet top, and sometimes the wall or ceiling if necessary.
Securing to the Cabinet Face Frame
The face frame offers the most solid point of attachment.
- Dry Fit: Hold the first piece of molding in place. Check that the angle fits perfectly against the adjacent wall or cabinet.
- Apply Adhesive: Run a thin bead of best adhesive for cabinet crown molding (construction adhesive works well) along the back edges of the molding that will contact the cabinet face frame.
- Nailing Strategy: Use finish nails (1.5 or 2 inches long). If you have a nail gun, set the pressure so the nail heads sink just below the wood surface.
- For attaching cabinet crown molding to a cabinet run, nail through the molding directly into the cabinet face frame. Place nails every 8 to 12 inches.
- Nail at a slight angle (toenailing) when possible for a stronger grip, especially if you are securing it primarily to the cabinet top or ceiling.
Securing to the Ceiling or Wall
When mounting crown molding above cabinets, you need to anchor it securely to the ceiling plane or the wall structure.
- If the molding touches the ceiling, drive finishing nails up into the ceiling joists or drywall structure. Use a stud finder to locate solid wood blocking if available, as this provides the best hold.
- If the gap between the molding and the ceiling is small, the nails into the cabinet face frame may be sufficient. If the gap is large, you might need small wood shims placed between the molding and the ceiling to close the gap before nailing.
Joining Mitered Pieces
When joining two pieces at a corner or along a straight run:
- Apply a thin bead of wood glue along the cut edge of one piece before bringing it to meet the other piece.
- Push the joint together tightly.
- Secure both pieces with nails into the structure underneath. The glue provides the strength, and the nails hold it tight while the glue dries. This step is critical for professional-looking finishing cabinet tops with molding.
Step 4: Handling Straight Runs and End Caps
Not every section requires an angle. Straight runs connect two corners, and end caps finish the look at the edge of a cabinet run.
Straight Sections
For long, straight sections of cabinet molding application for cabinets, you must secure the molding firmly to the cabinet structure, especially the top support rail, if one exists.
- If the section spans multiple cabinets, nail it into the face frame of each cabinet.
- If the molding is long (over 3 feet), use a few dabs of construction adhesive in the middle as well, securing it to the cabinet structure where it won’t be visible.
Finishing Open Ends (If Not Meeting a Wall)
If your cabinet run stops mid-wall, you need an “end cap” or “return.” This is where a small piece of molding is cut to turn the profile back toward the wall, hiding the raw, cut end.
- Take a short piece of molding.
- Cut an inside corner (as detailed in Step 2) on one end of this small piece.
- Attach this small piece to the end of your main molding run using glue and small brad nails. This small piece creates a neat visual stop. This is part of high-quality finishing cabinet tops with molding.
Step 5: Achieving a Seamless Look (Filling and Finishing)
This final stage separates a good job from a great one. Gaps in cabinet molding corner cuts and nail holes must be dealt with.
Filling Nail Holes
Use a small amount of wood putty or colored filler for the nail holes. Wipe off the excess immediately.
Caulk is Your Best Friend
Caulk hides the slight imperfections where the molding meets the cabinet or the ceiling.
- Use paintable acrylic latex caulk. If your cabinets are painted, use white or off-white caulk. If they are stained wood, look for a stainable caulk (though often it’s easier to just paint the molding later).
- Run a thin, smooth bead of caulk along all seams: where the molding meets the ceiling, where it meets the wall, and any slightly imperfect miter joints.
- Use a damp finger or a damp, smooth rag to smooth the caulk line. Wipe away excess immediately. This smooth line makes the crown molding application for cabinets look factory-installed.
Painting or Staining
If your molding is unfinished or a different color than your cabinets:
- Painted Cabinets: Paint the crown molding to match the existing cabinet color, or choose a contrasting color for visual emphasis. Prime the wood first, then apply two finish coats.
- Stained Cabinets: If the molding is real wood (not MDF), you can stain it to match. Test the stain on an off-cut first, as different woods absorb stain differently.
This entire process, from planning to final coat, completes your DIY cabinet crown molding guide.
Advanced Technique: Dealing with Uneven Ceilings
Most homes do not have perfectly level ceilings. This is the biggest challenge in installing crown molding on kitchen cabinets.
If your ceiling slopes up slightly over a long run, a standard 45-degree cut will leave a visible gap along the top edge.
Shimming the Angle
The solution is to slightly adjust the spring angle of your cut.
- Take a long piece of scrap wood that matches the thickness of your molding.
- Place the molding and the scrap wood together on your saw table, simulating the assembly.
- Use a digital angle finder to measure the actual slope of your ceiling where the molding will sit.
- Adjust your saw’s bevel setting slightly away from the standard spring angle (e.g., if the ceiling slopes up, you might need a slightly shallower bevel cut, or vice versa).
- Test the fit on a scrap piece repeatedly until the joint is tight against both the cabinet and the ceiling surface. This fine-tuning is essential for professional finishing cabinet tops with molding in older homes.
Troubleshooting Common Issues in Attaching Cabinet Crown Molding
| Problem | Cause | Simple Fix |
|---|---|---|
| Gaps at Mitered Corners | Inaccurate angle cuts or uneven walls/ceilings. | Fill gaps generously with caulk before painting. |
| Molding Won’t Stay Put While Nailing | Adhesive hasn’t set, or angles are slightly off. | Use painter’s tape or temporary supports (like T-braces) to hold the molding tightly while you nail it in place. |
| Nails Aren’t Sinking | Nail gun pressure too low, or you hit dense wood blocking. | Increase nail gun pressure slightly, or use a nail set tool to tap the heads below the surface. |
| Visible End Grain on Straight Runs | Failed to cut a return/end cap. | Cut a tiny return piece (as described in Step 3) and glue/nail it to the end. |
Conclusion on Installing Crown Molding on Kitchen Cabinets
Installing crown molding on kitchen cabinets transforms the entire space. It takes patience, especially when mastering cabinet molding corner cuts and achieving the perfect fit during mounting crown molding above cabinets. By measuring carefully, setting up your saw correctly for the spring angle cuts, and using quality adhesive and fasteners, you can successfully complete this detailed project. The clean lines achieved through careful finishing cabinet tops with molding will make your kitchen look professionally renovated.
Frequently Asked Questions (FAQ)
Q: What is the best way to join two pieces of molding in a straight line?
A: For straight runs, butt the two pieces together firmly. Apply high-quality wood glue to the cut ends before joining them. Then, nail both pieces into the underlying cabinet structure securely. The glue provides the strength, and the nails hold the joint tight while the glue dries.
Q: Can I use just adhesive for attaching cabinet crown molding?
A: While construction adhesive works well for holding the molding against the cabinet structure, it is highly recommended to use finishing nails as well. Adhesive alone may allow the molding to sag or pull away over time, especially as temperatures and humidity change. Nails provide immediate, rigid support.
Q: Do I need to cut the molding at a 45-degree angle if the ceiling is perfectly flat?
A: Even if the ceiling is flat, crown molding is designed to sit at a specific angle (the spring angle) against the wall and the ceiling plane. If you cut both pieces at 90 degrees (a simple butt joint) and try to fasten it, it will stick out awkwardly, creating a large, ugly gap at the top. Always use mitered cabinet molding corner cuts designed for the molding profile.
Q: What type of caulk is the best adhesive for cabinet crown molding filler?
A: For filling gaps between the molding and the ceiling or wall, use a high-quality, paintable acrylic latex caulk. This type of caulk remains flexible, allowing for slight movement in the house structure without cracking. Ensure it matches your paint color for the best visual result after finishing cabinet tops with molding.
Q: How far apart should the nails be when mounting crown molding above cabinets?
A: For secure mounting crown molding above cabinets, place nails roughly every 8 to 12 inches along the solid parts of the cabinet face frame. If you are also nailing into the ceiling structure, space those nails similarly. If the molding run is very long, add an extra nail in the center section to prevent bowing.