
Yes, you can replace the sprayer on your kitchen sink, and often, it is a straightforward DIY task. This guide will walk you through everything needed for a successful kitchen faucet sprayer replacement.
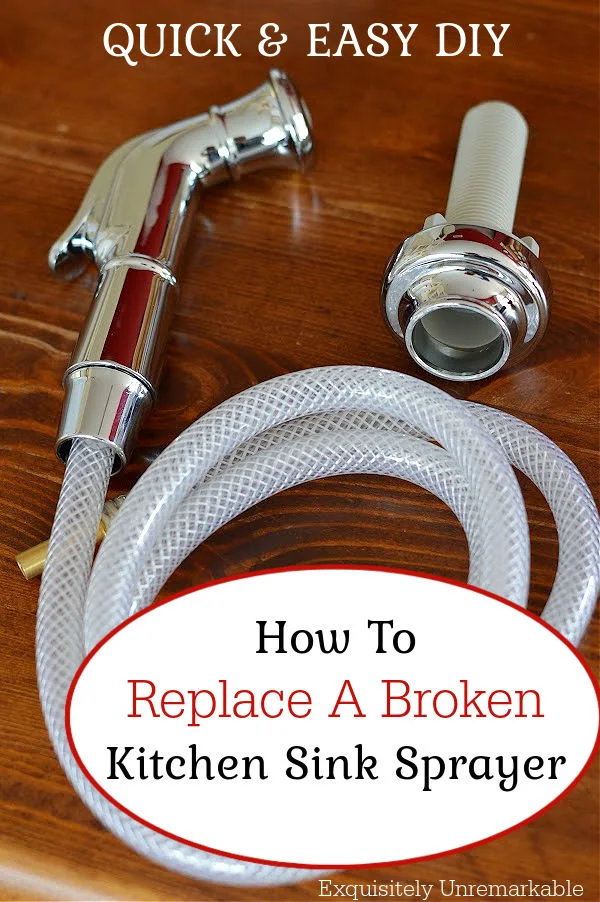
Image Source: blogger.googleusercontent.com
Preparing for Your Kitchen Sink Sprayer Replacement Project
Replacing a sprayer might seem daunting, but with the right tools and a clear plan, anyone can do it. Whether you need to perform a repair kitchen sink sprayer or upgrade your setup entirely, preparation is key. This applies whether you have an older side sprayer or a modern pull down sprayer head change.
Tools and Materials You Will Need
Gathering your supplies beforehand saves a lot of time later. Good preparation makes the process much smoother.
| Tool/Material | Purpose | Notes |
|---|---|---|
| New Sprayer Assembly | The replacement part. | Ensure it matches your faucet type (side mount vs. pull-down). |
| Adjustable Wrench | For loosening and tightening nuts. | Or a basin wrench for tight spaces. |
| Pliers | Good for gripping small parts. | Needle-nose pliers are often helpful. |
| Bucket or Towels | To catch dripping water. | Water will leak out when you detach sink sprayer hose. |
| Safety Glasses | To protect your eyes. | Always a good idea when working under the sink. |
| Utility Knife or Screwdriver | To cut old sealant or pry clips. | Use carefully to avoid scratching surfaces. |
| Plumber’s Tape (Teflon Tape) | To seal threads and prevent leaks. | Essential for a watertight connection. |
| Flashlight or Headlamp | Visibility under the sink is often poor. | Makes seeing connections much easier. |
Selecting the Right Replacement Sprayer
The biggest hurdle is often finding the correct part. Not all sprayers are the same.
Side Sprayer vs. Pull-Down/Pull-Out Sprayers
Older sinks often have a separate side sprayer unit mounted next to the main faucet. Newer faucets integrate the sprayer into the main spout.
- Side Sprayer Replacement: This is usually easier. You replace the handle unit and the hose connected to the main faucet body under the sink.
- Pull Down Sprayer Head Change: For these, you typically only replace the spray head itself, which unscrews from the main hose. If the hose is damaged, you might need a full assembly replacement.
If you are unsure, look for a universal kitchen faucet sprayer kit, though specific brand matches are usually best for pull-down models. Checking reviews for the best kitchen sink sprayer replacement kits can guide your purchase.
Part 1: Removing the Old Kitchen Sink Sprayer
This is the part that requires getting down low and working in tight quarters. Safety first!
Step 1: Shut Off the Water Supply
Before you do anything else, turn off the water.
- Locate the hot and cold water shut-off valves under the sink.
- Turn both valves clockwise until they stop.
- Turn on the old faucet sprayer briefly. This releases any built-up pressure. Water flow should stop completely.
Step 2: Clear the Workspace
Crawl under the sink. Remove everything from the cabinet area beneath the sink basin. You need room to move your body and tools. Use your flashlight to clearly see where the sprayer hose connects.
Step 3: Detaching the Sprayer Hose Under Sink
This step varies depending on your setup.
For Side Sprayers:
The hose connects to the main faucet body or a dedicated port underneath the counter.
- Find the mounting nut that holds the sprayer base to the countertop. Use your adjustable wrench or basin wrench to loosen this nut. Turn counter-clockwise.
- Once the external part is loose, look at the connection underneath. You will see the hose coming from the sprayer handle connecting to a supply line or the faucet base.
- Use pliers or a wrench to loosen the coupling nut connecting the sprayer hose. Be ready; a small amount of water might escape.
- If you are replacing the entire side sprayer unit, carefully lift the old sprayer handle out of the hole on the countertop.
For Pull-Down Sprayers:
For these, the connection point is usually a quick-connect fitting or a threaded coupling attached to the main faucet hose running up through the sink deck. This process is often covered when pull out faucet sprayer troubleshooting.
- Follow the hose from the sprayer head down toward the faucet body.
- Identify the connection point. Many modern faucets use a quick-release clip or lever. Press the release mechanism if present.
- If it is threaded, use a wrench to disconnect sprayer hose under sink. Turn slowly to avoid damaging the other lines.
- If your sprayer head is clogged, you might only need to change the head itself, not the hose. In this case, unscrew the old head from the hose end, usually by turning the old head counter-clockwise.
Step 4: Removing the Old Sprayer Head (If Applicable)
If you are only changing the head on a pull-down model:
- Once the hose is disconnected, pull the old sprayer head off the hose end.
- If you notice wear or damage on the hose itself, you must proceed with a full replacement, not just a head swap.
Part 2: How to Install New Sink Sprayer
Now it is time to install new sink sprayer. Take your time to ensure every connection is secure.
Step 5: Preparing the New Sprayer Hose and Head
If you purchased a complete kitchen faucet sprayer replacement kit, the hose may already be attached to the new sprayer head. If not:
- Apply a layer of plumber’s tape (Teflon tape) clockwise around the threads of the hose connection point where the sprayer head will attach. This prevents leaks.
- Screw the new sprayer head onto the hose. Hand-tighten firmly, then give it a slight snug with pliers (but do not overtighten).
Step 6: Mounting the New Side Sprayer (If Replacing a Side Unit)
If you are installing a replace side sprayer kitchen sink unit:
- Feed the new hose down through the mounting hole in the sink or countertop.
- From underneath, slide the mounting washer and nut onto the hose connection sticking down from the faucet base.
- Hand-tighten the nut. Ensure the sprayer handle above the counter is straight before fully tightening it with your wrench.
- Connect the new sprayer hose to the correct outlet on the main faucet body. Again, use plumber’s tape on the threads and tighten securely.
Step 7: Connecting the New Pull-Down Hose (If Replacing the Whole Unit)
For pull-down systems, the new hose needs to be connected to the faucet body underneath.
- Feed the new hose down through the faucet body hole if you replaced the entire faucet assembly. If you are just replacing the hose, connect the new hose to the main faucet mechanism according to the manufacturer’s instructions.
- If your system uses a quick-connect feature, line up the fittings and push them together until you hear or feel a solid click.
- If it is threaded, wrap the threads with plumber’s tape. Connect the hose and tighten firmly with a wrench.
Step 8: Attaching the Counterweight (Pull-Down Models Only)
Pull-down sprayers rely on a small weight attached to the hose loop under the sink. This weight retracts the sprayer head when you let go.
- Find the spot on the lower loop of the new sprayer hose (this is the part of the hose that moves freely when you use the sprayer).
- Clip or screw the new counterweight onto this section of the hose.
- Test the movement. The weight should be heavy enough to pull the head back into the spout, but not so heavy that it is hard to pull out.
Part 3: Testing and Final Checks
Never skip the testing phase. A small leak under the sink can cause big problems later.
Step 9: Turning the Water Back On Slowly
- Go back under the sink. Double-check all connections you tightened.
- Slowly turn the hot and cold shut-off valves back on (counter-clockwise). Listen and watch for immediate leaks around the connections.
- If you see drips, turn the water back off immediately and gently tighten the leaking connection a quarter turn more. Add more plumber’s tape if necessary.
Step 10: Testing the Sprayer Function
- Turn the faucet handle to run water through the new sprayer. Start with the sprayer set to the “stream” mode if possible.
- Cycle through all spray settings (e.g., spray, pause).
- Use the sprayer in the sink basin. Ensure it retracts properly if it is a pull-down model.
- While the water is running, look carefully under the sink one last time with your flashlight. Check every joint for drips or slow leaks.
If everything looks dry and works smoothly, congratulations! You have successfully completed your kitchen faucet sprayer replacement.
Troubleshooting Common Sprayer Issues
If you run into trouble, these tips can help solve common problems often experienced during a pull out faucet sprayer troubleshooting session or general repair.
Leaks at the Connection Point
Leaks are the most common issue.
- Cause: Poorly seated hose, missing or worn-out O-rings/washers, or insufficient thread sealant.
- Fix: Disconnect the leaking joint. Inspect the O-ring or rubber washer inside the connection. If it looks flat or cracked, replace it. Reapply plumber’s tape (three wraps is usually enough) to the male threads, reconnect, and tighten until snug.
Sprayer Head Won’t Retract (Pull-Down Models)
This is a frequent complaint when you repair kitchen sink sprayer.
- Cause: The counterweight is missing, installed incorrectly, or too light. The hose might also be kinked.
- Fix: Check the weight placement. It should be on the lowest part of the hose loop. If it’s fine, ensure the hose isn’t snagging on pipes or cabinet walls. Sometimes, debris gets caught in the retracting mechanism inside the faucet body, requiring a full disassemble/clean, which might be beyond a simple hose swap.
Low Water Pressure from the Sprayer
If the stream is weak, it is often related to clogs.
- Cause: Mineral deposits (scale) are clogging the aerator screen inside the sprayer head.
- Fix: Unscrew the sprayer head completely. Soak the head in white vinegar overnight. Use a small pin or toothpick to gently clean out any visible debris from the nozzle holes. Rinse well before reattaching.
Difficulty Accessing Connections
Working under the sink is tough, especially with older plumbing.
- Cause: Lack of space, old corroded fittings.
- Fix: Invest in a basin wrench. This specialized tool has a long handle and a pivoting jaw designed specifically for reaching nuts in tight spaces behind the sink basin. Patience is vital here. If fittings are badly corroded, you may need a penetrating oil spray to help loosen them before attempting to turn them.
When to Call a Professional Plumber
While most sprayer replacements are manageable DIY projects, know when to stop. If you encounter these situations, calling a plumber is wise:
- The existing shut-off valves under the sink leak when you try to turn them off.
- Fittings are so corroded or stuck that you risk breaking the main faucet body trying to remove them.
- You are installing a complex pull-out faucet system and the internal connections are non-standard or require specialty tools.
- After installation, you cannot stop a persistent leak, even after re-taping and tightening.
If you are dealing with an older faucet and cannot find compatible parts, a plumber can advise on whether a full faucet replacement is more economical than sourcing obscure parts for your replace side sprayer kitchen sink model.
Frequently Asked Questions (FAQ)
Q: How do I know if I need a new hose or just a new sprayer head?
A: If the water leaks from the hose itself (not at the connection points), or if the hose is visibly cracked or frayed, you need a new hose. If the water pressure is low or uneven, and you have cleaned the head, you likely need a new head. For pull-down models, if the hose feels stiff or sticky when pulling out, replacing the hose is necessary.
Q: Can I use a universal kitchen faucet sprayer on any sink?
A: For side sprayers, yes, many are designed to fit standard mounting hole sizes (usually 1 3/8 inches). However, for pull-down or pull-out faucets, the connections are often proprietary to the faucet brand and model. It is always safer to buy a replacement specifically designed for your existing faucet brand to ensure compatibility and proper retraction mechanism function.
Q: Do I need to turn off the main water supply to the house?
A: Usually, no. Shutting off the hot and cold water supply valves directly under the sink is sufficient for replacing the sprayer or hose, as these valves control the water flow to that specific fixture. Only turn off the main house supply if the under-sink valves do not work or are leaking themselves.
Q: What is the purpose of the weight on a pull-down sprayer hose?
A: The weight acts as a counterbalance. When you pull the sprayer head out of the faucet, the hose extends. The weight, attached to the bottom loop of the hose, ensures that gravity pulls the hose back down and retracts the sprayer head smoothly and securely back into the spout when you are done using it.