
What is a kitchen sink cookie? A kitchen sink cookie is a rich, decadent cookie packed with a huge variety of mix-ins, often including chocolate chips, nuts, pretzels, potato chips, toffee, and sometimes even cereal or candies. The name comes from the idea that bakers throw everything but the kitchen sink into the dough.
This cookie style is popular because it lets bakers get creative. It’s the perfect way to use up those odds and ends left in your baking cabinet. If you love overloaded cookie recipes and treats with lots of crunch and flavor, the kitchen sink cookie recipe is for you. Let’s explore the history, the best way to make them, and what makes them taste so good.
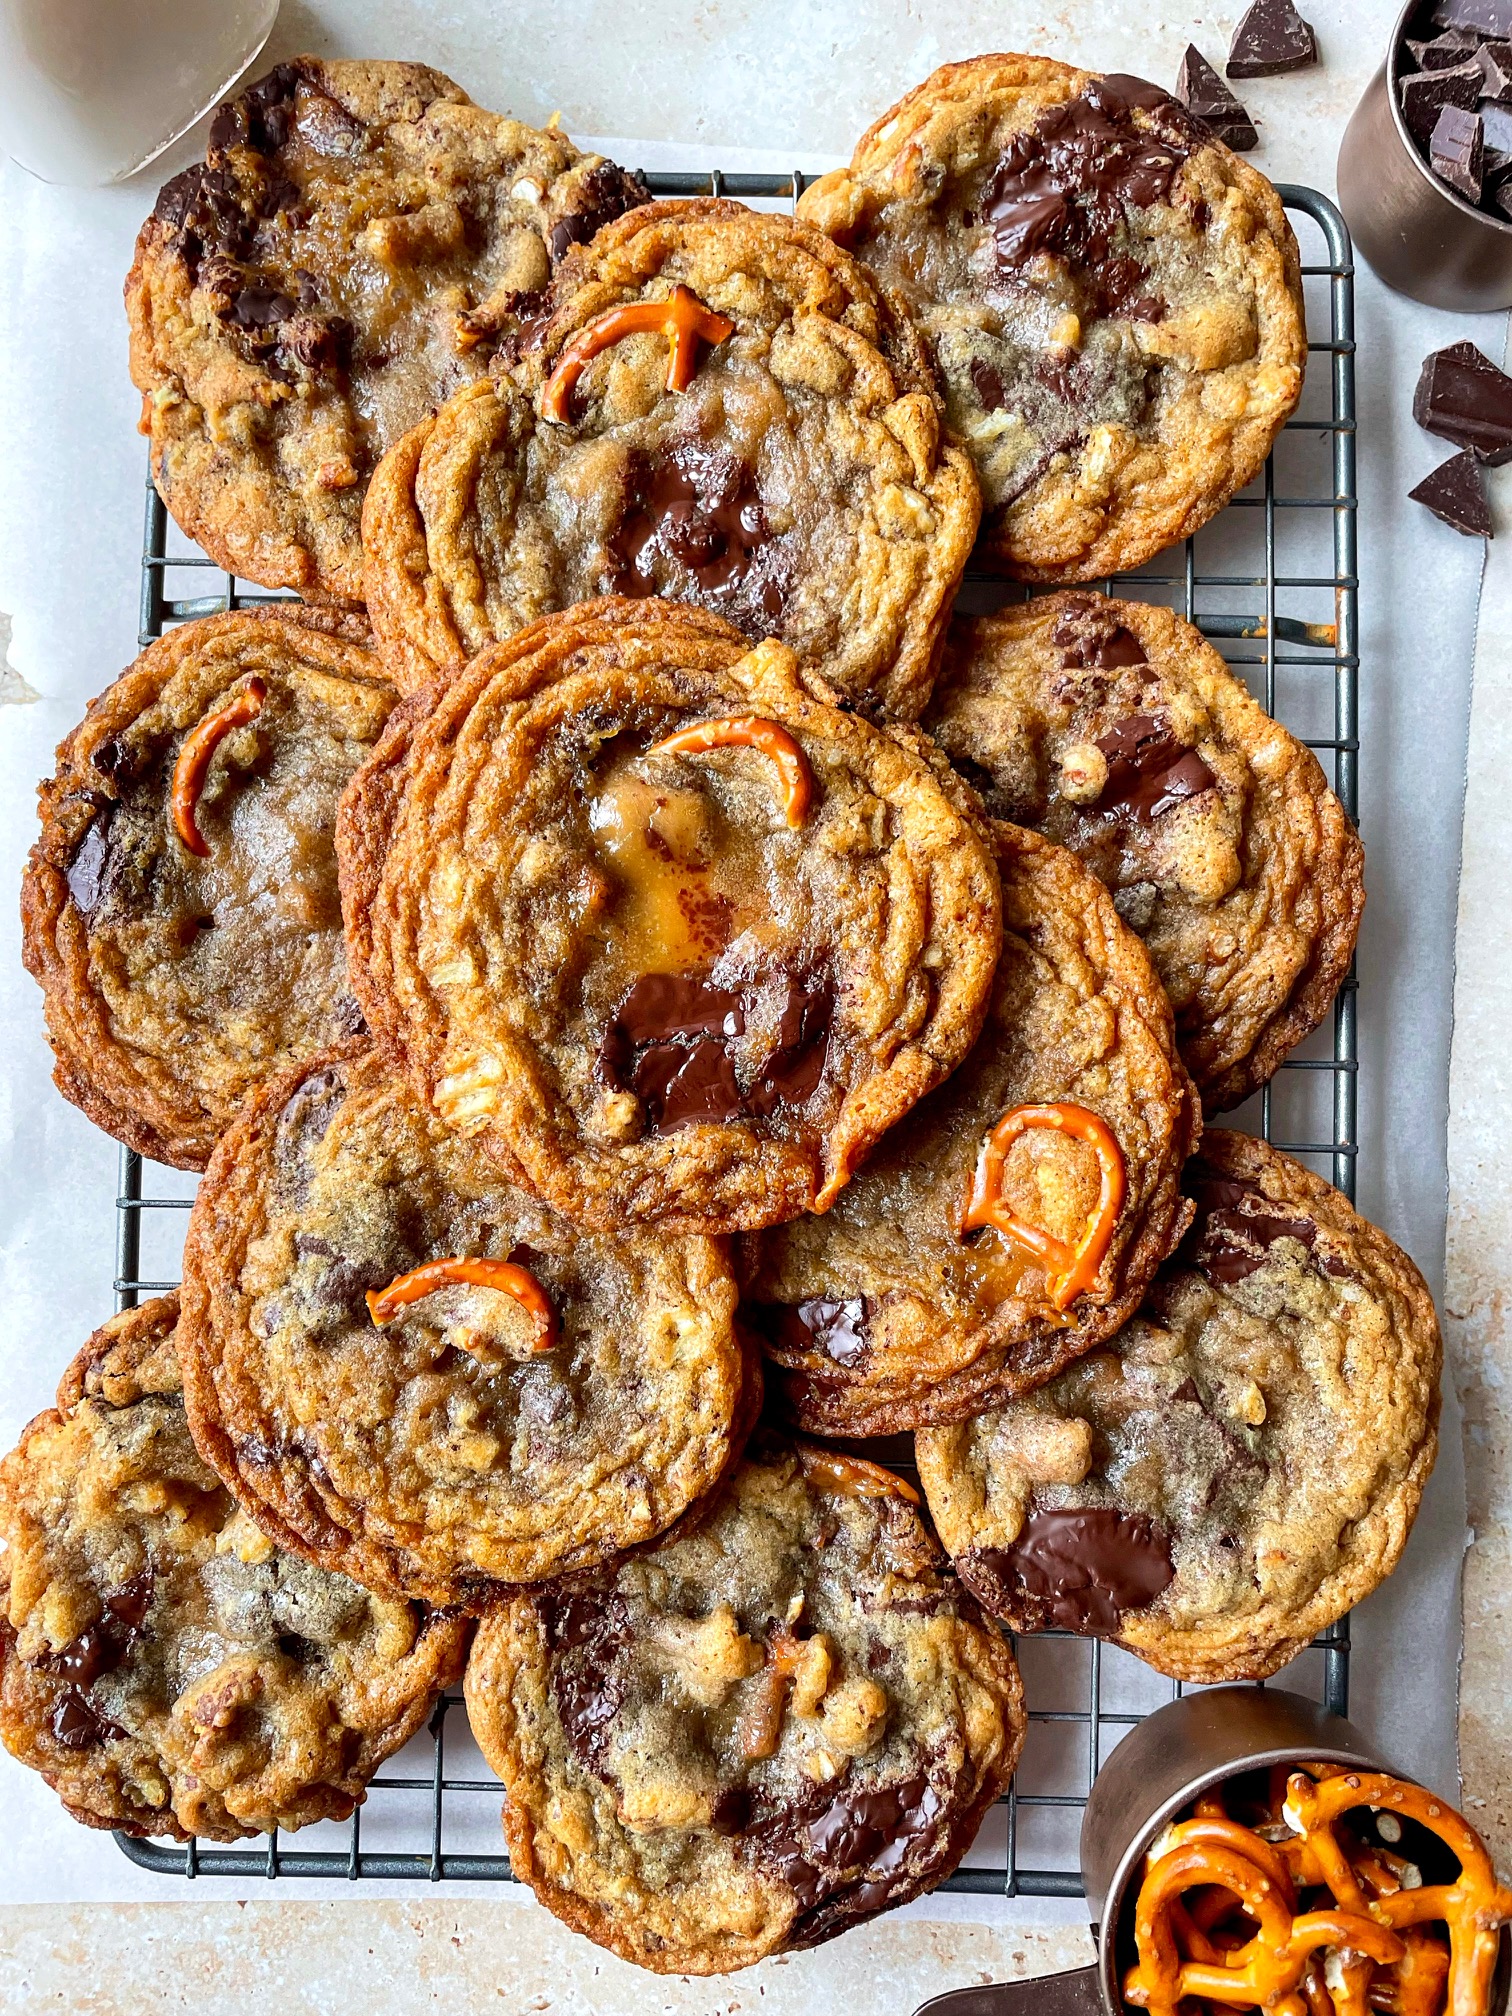
Image Source: thechowdownblog.com
Tracing the Roots of the Kitchen Sink Cookie
The idea of throwing everything into a cookie isn’t entirely new. People have made “everything cookies” for decades. However, the specific term “kitchen sink cookie” gained real traction in the last decade or so. It speaks to a certain playful, maximalist approach to baking.
The Influence of Leftovers and Inspiration
The core spirit of the kitchen sink cookie recipe is using what you have. Think about why people started making these.
- Pantry Raid Cookies: Sometimes you look in the pantry and see half a bag of M&Ms, a few chocolate chips, some leftover pretzels, and a handful of nuts. Instead of letting them go stale, you combine them into one super cookie. This necessity birthed what we now call pantry raid cookies.
- Bakery Trends: As gourmet and oversized cookies became popular, bakers looked for ways to make their cookies stand out. Adding strange, crunchy, or salty items made their cookies memorable. This led to the creation of the ultimate loaded cookie.
The name itself is brilliant marketing. It instantly tells you this isn’t a plain chocolate chip cookie; it’s wild, fun, and full of surprises.
Distinguishing It From Other Loaded Cookies
While many cookies are loaded, the kitchen sink cookie has a specific vibe.
| Cookie Type | Key Characteristic | Typical Mix-Ins |
|---|---|---|
| Kitchen Sink Cookie | Extreme variety, salty/sweet mix, often uses unexpected items. | Chips, pretzels, toffee, cereal, marshmallows. |
| Monster Cookie | Defined by peanut butter, oatmeal, and often M&Ms. | Oatmeal, peanut butter, M&Ms, chocolate chips. |
| Garbage Cookie | Similar to Kitchen Sink, sometimes includes more savory things like bacon bits (less common now). | Broad collection of sweets and snacks. |
The kitchen sink cookie emphasizes texture and surprise over a single defining flavor like peanut butter.
Deciphering the Core Ingredients in Kitchen Sink Cookies
So, what are kitchen sink cookies made of? The answer is almost anything! But to make them truly great, you need a solid base recipe. A good base ensures the dough holds up to the heavy load of mix-ins.
The Foundation: The Dough
The dough needs to be sturdy. A standard, slightly chewy chocolate chip cookie dough works best. Too much butter or a very thin dough will spread too much, resulting in a flat, greasy cookie overloaded with goodies.
Essential Dough Elements:
- Fats: Usually a mix of softened butter and sometimes a little oil for moisture.
- Sugars: A blend of brown sugar (for chewiness and molasses flavor) and granulated sugar (for spread and crisp edges).
- Flour: All-purpose flour provides the structure.
- Leavening: Baking soda is standard. Some recipes add a bit of baking powder for lift, helping the thick dough bake evenly.
- Flavor Enhancers: Vanilla extract and salt are non-negotiable for balancing the sweetness of the additions.
The Stars: Mix-Ins and Combinations
This is where the fun begins. A great kitchen sink cookie recipe balances sweet, salty, crunchy, and chewy elements. You want layers of flavor and texture in every bite.
Common Ingredients in Kitchen Sink Cookies:
- Chocolate: Chocolate chips (milk, semi-sweet, dark), chocolate chunks, or chopped candy bars.
- Salty Crunch: Pretzels (rods or twists, broken up), potato chips (plain, crushed). This contrast is key to the flavor profile.
- Chewy Elements: Toffee bits, caramels, dried fruit (cranberries or cherries).
- Nuts: Pecans, walnuts, or almonds add depth and texture.
- Wild Cards: These unique cookie combinations are what truly define the kitchen sink cookie. They can include:
- Mini marshmallows
- Different types of cereal (Cheerios, Corn Flakes)
- White chocolate chips or butterscotch chips
- Sprinkles (for color)
Achieving the Right Ratio
The biggest challenge in making these cookies is the ratio of dry ingredients (dough) to wet ingredients (mix-ins). Too many mix-ins, and the dough won’t bind. Too few, and it’s just a chocolate chip cookie with a few extras.
A good guideline is that the mix-ins should make up about 50% to 75% of the total volume of the dough after mixing. This means you are adding a lot!
The Ultimate Kitchen Sink Cookie Recipe
To help you create the best kitchen sink cookies, here is a detailed, adaptable recipe designed for maximum texture and flavor payoff. This recipe aims for thick, soft-centered cookies that can handle a heavy load.
Prep Work and Ingredients List
This recipe yields about 18 large cookies.
Table 1: Kitchen Sink Cookie Ingredients
| Component | Ingredient | Amount | Notes |
|---|---|---|---|
| Dough Base | Unsalted Butter, softened | 1 cup (2 sticks) | Room temperature is essential. |
| Light Brown Sugar, packed | 1 cup | Use tightly packed. | |
| Granulated Sugar | 1/2 cup | ||
| Large Eggs | 2 | Lightly beaten. | |
| Vanilla Extract | 1 tablespoon | Use good quality vanilla. | |
| All-Purpose Flour | 2 1/2 cups | Measure correctly (spoon and level). | |
| Baking Soda | 1 teaspoon | ||
| Salt | 1 teaspoon | Important for balance. | |
| The Mix-Ins | Semi-Sweet Chocolate Chips | 1 cup | |
| Milk or Dark Chocolate Chunks | 1/2 cup | ||
| Toffee Bits | 1/2 cup | ||
| Chopped Walnuts or Pecans | 1/2 cup | Toasted nuts taste better. | |
| Crushed Pretzels | 1 cup | Roughly crushed. | |
| Crushed Potato Chips (plain) | 1 cup | Do not use flavored chips. | |
| Optional: White Chocolate Chips | 1/2 cup |
Step-by-Step Baking Instructions
Follow these steps carefully to manage the dough and ensure proper baking. These are truly messy cookie recipes, so be prepared for a good mixing session!
Step 1: Prepare the Dry Ingredients and Mix-Ins
- In a medium bowl, whisk together the flour, baking soda, and salt. Set this aside.
- In a separate large bowl, gently combine all your chosen mix-ins (chocolates, toffee, nuts, pretzels, chips). You want the pretzels and chips broken into medium pieces, not powder.
Step 2: Cream the Fats and Sugars
- In the bowl of a stand mixer (or using a hand mixer), beat the softened butter, brown sugar, and granulated sugar together. Beat them until the mixture is light and fluffy. This takes about 3 to 4 minutes. This creaming step adds air, which helps the thick dough rise.
Step 3: Add Wet Ingredients
- Beat in the eggs, one at a time, mixing well after each addition.
- Stir in the vanilla extract. Scrape down the sides of the bowl.
Step 4: Incorporate the Flour
- Slowly add the dry flour mixture to the wet ingredients. Mix on low speed just until the flour streaks disappear. Do not overmix! Overmixing develops gluten, making the cookie tough.
Step 5: Fold in the Load
- Remove the bowl from the mixer. Now, gently fold in your large bowl of mix-ins using a rubber spatula. Fold until they are just evenly distributed. The dough will look extremely heavy and chunky—this is exactly right for kitchen sink cookies.
Step 6: Chill the Dough (Recommended)
- Cover the dough and chill it in the refrigerator for at least 1 hour, or up to 2 days. Chilling solidifies the fat, which prevents the cookies from spreading too much when they bake, especially with so many heavy additions.
Step 7: Scoop and Bake
- Preheat your oven to 375°F (190°C). Line baking sheets with parchment paper.
- Scoop the dough into large balls (about 3 tablespoons each). Place them about 3 inches apart on the baking sheet.
- Pro Tip for Presentation: Press a few extra chocolate chips or pretzel pieces onto the tops of the dough balls before baking. This makes them look extra appealing.
- Bake for 10 to 14 minutes. The edges should look set and golden brown, but the centers should still look slightly soft and underbaked.
- Let the cookies cool on the baking sheet for 5 minutes before moving them to a wire rack to cool completely. They will firm up as they cool.
Fathoming the Flavor and Texture Experience
Why do people crave these cookies? It’s all about the sensory overload. The kitchen sink cookie is an adventure in every bite.
The Symphony of Textures
The texture is perhaps the most defining characteristic of overloaded cookie recipes.
- Soft & Chewy Center: Provided by the slightly underbaked dough, thanks to the brown sugar content.
- Crisp Edges: A slight crispness develops around the perimeter from the edges baking thoroughly.
- Salty Snap: Pretzels and chips provide a sharp, sudden crunch that breaks up the softness of the cookie matrix.
- Melted Goo: Pockets of melted chocolate and soft toffee create gooey pockets of deliciousness.
Interpreting the Flavor Profile
The flavor profile of a true kitchen sink cookie is the perfect sweet and salty dance.
When you bite into one:
- You get the deep sweetness of brown sugar and chocolate.
- This is immediately contrasted by the savory, salty crunch of the chips or pretzels.
- The nuts provide an earthy, buttery note, while toffee adds a deep, caramelized sweetness.
It avoids being overly sweet because the salty elements constantly reset your palate, inviting you to take another bite. It’s comforting like a classic cookie but exciting because you never know exactly what texture you’ll encounter next.
Tips for Mastering Kitchen Sink Cookies
Creating the ultimate loaded cookie requires a few key strategies to ensure the dough behaves.
Controlling Spread
Because these cookies are so loaded, they tend to spread flat. Follow these tips to keep them thick:
- Chill, Chill, Chill: As mentioned, chilling the dough for at least an hour is crucial. Cold fat melts slower in the oven, helping the cookie hold its shape longer.
- Use Chilled Mix-Ins: If you have time, briefly chill your mix-ins (especially the chocolate) before folding them in.
- Don’t Flatten: Scoop the dough onto the sheet without pressing it down. Let the oven do the work.
Managing the Messy Cookie Aspect
These recipes are inherently messy because you are cramming so many things into a small amount of dough.
- Use the Right Tool: A sturdy wooden spoon or a large rubber spatula is better for folding in the massive amount of mix-ins than a hand mixer attachment.
- Work in Batches: If you are making a huge batch, mix the dough base first, then divide it in half. Mix half the mix-ins into one half of the dough, and the other half of the mix-ins into the second half. This makes the folding manageable.
Sourcing Unique Additions
To create truly unique cookie combinations, don’t limit yourself to the standard chips and nuts. Think about items you commonly snack on:
- Small bits of dried sour candy.
- Crushed peppermint patties in the winter.
- Small pieces of leftover brownie or blondie batter baked inside the cookie dough.
- Crushed shortbread cookies for extra buttery flavor.
When trying new things, make sure they are relatively dry. Very moist additions, like fresh fruit or soft caramel sauce, can make the dough too wet and cause the cookie to fail structurally.
Frequently Asked Questions About Kitchen Sink Cookies
Q: Can I use all the mix-ins at once, or should I divide them?
A: For a standard batch, you can often add all your chosen mix-ins at once, provided you are using a stand mixer with a paddle attachment or mixing by hand very carefully. If you are trying to include over 5 or 6 cups of mix-ins total, divide the dough base first and fold the additions into smaller batches. This ensures even distribution and prevents overmixing the flour.
Q: Do I need to use both pretzels and potato chips?
A: No, you do not need both. The goal is to introduce a salty, crunchy element. Many people prefer just pretzels because they hold up slightly better during baking. However, using both gives you two distinct salty tastes and textures. Choose whichever snack you enjoy more!
Q: How should I store leftover kitchen sink cookies?
A: Store them in an airtight container at room temperature. Because they are so loaded, they tend to stay soft longer than plain cookies. They should last well for 4 to 5 days. If you want them to last longer, place parchment paper between layers of cookies before sealing the container.
Q: Can I make this cookie vegan or gluten-free?
A: Yes, absolutely! To make these pantry raid cookies vegan, substitute the butter with a high-quality vegan butter stick and use flax or commercial egg replacers. For gluten-free cookies, replace the all-purpose flour with a good 1:1 gluten-free blend that contains xanthan gum. Note that gluten-free doughs may require slightly longer chilling times.
Q: Why did my kitchen sink cookies spread into one giant flat disc?
A: This usually happens for one of three reasons: your butter was too soft or melted when you started mixing; you didn’t use enough flour relative to the mix-ins; or you skipped chilling the dough. Always start with room-temperature, but not melted, butter, and always chill the final dough thoroughly before baking.